Pages

Thursday, December 27, 2018

In the Designer Spotlight

Hi everyone!

I hope you are enjoying the holidays with family and friends.

December has been even more full than usual this year so my posts have been sparse.  But, the end of the year has brought some great news I'm excited to share.

I am in the Designer Spotlight for one of my favorite bead manufacturers - Halcraft Collection.  You may have seen Halcraft beads at Michaels with their Bead Gallery line.  Or, at Joann's in their Bliss Beads line.  Now, you can find them on their own website.  Their selection of beads continues to expand and get better and better.

Here's the start of the article:

Sheree's Studio
Welcome to December's Designer Spotlight!

I've followed and admired Terry Ricioli's work for years! Not only does Terry create beautiful jewelry, but she also teaches others how to do the same thing by submitting her pieces to magazines for publishing and teaching at her local craft store.

You might have seen her work in "Beadwork" as well as "Stringing" magazines. I'm so pleased to introduce her as December's Spotlight Designer!
Terry started creating craft designs when her daughters were small. She was a stay-at-home mom and needed a creative outlet. She tried creative writing and found the craft magazine niche. Over the years, she's had many designs published in craft magazines and books. She's been on a variety of design teams and has had a love making things since she was little. She likes to try a little of everything! 

And, here's the link for the rest of the spotlight.

A big thank you to Molly Schaller and Denise Yezbak Moore and to everyone at Halcraft!
Happy New Year!


Wednesday, December 26, 2018

New Plastic Canvas Designs

Hi Everyone!

I have a few new designs coming out with Herrschners.  If you love plastic canvas, there are a lot of new items on their website now.

Woven baskets perfect for your summertime table or for a little gift!

Summertime Baskets

My version of the popular red pickup truck with some tree coasters.
Vintage Red Pickup Truck with Coasters
And, a sampler tissue cover for every season!
Sampler Tissue Covers
Thanks for stopping by.  Happy stitching!

Wednesday, November 28, 2018

Pretty Palettes Reveal for November

Hi everyone!

Hope you all had a wonderful Thanksgiving!  We celebrated with part of the family out at the old ranch house.

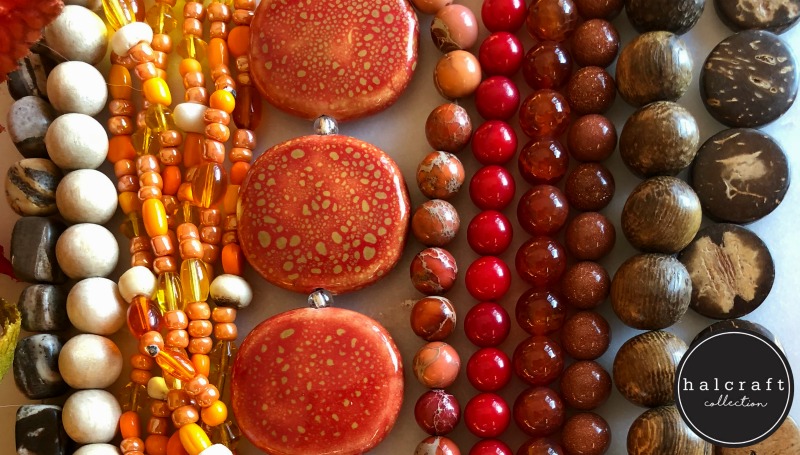
This month the Pretty Palettes from Halcraft and Molly Schaller is full of beautiful fall color and pumpkin spice.


I chose a few of these yummy beads for my own.  Ok, almost all of them!

Here is one of the necklaces that I created from zebra jade nuggets, some rosewood tubes and the stag pendant.  I added a hammered antique copper ring and spacers from TierraCast and a leather tassel and tied it together with brown waxed cord.
Stag Talisman Necklace
I imagine some ancient hunter wearing this necklace in hope of a successful hunt.  I love the primitive look of this combination of beads and fibers.

Here it is showing the way I made the clasp:
I drilled through the bead crosswise so that I could secure it as a toggle.  Then, I tied a loop in the waxed cord for the other side of the clasp.  I also wrapped the loop on the pendant with cord before tying the tassel.

Then, with the beautiful seed beads, ceramic squares, fire agate and imperial jasper rounds, I created another necklace.  This one reminds me of colorful Indian corn and pumpkins.
Corn Tassel Necklace
I love the seed bead mix and wish I'd bought some more of them!  Such a fun combination of colors and shapes!  This photo doesn't do them justice, but it was too rainy outside for an outdoor photo.

Here's another photo that's a little brighter:


Be sure to check out the Reveal for this inspiration and see what Molly Schaller and all the other members have created on the Halcraft facebook group page. And, go here for Halcraft's great selection of beads.

Saturday, November 3, 2018

Ocean Moods Necklace

Hi Everyone!

I'm so excited to finally be able to share the publication of one of my designs in Beadwork magazine!
I created this back in June, so it's a while between creation and publication!

I love the ocean and I always love to create in ocean colors.  Here I used blues and greens with bits of purple and brown.  All the beads were from Halcraft, which you can find online or at Michaels.  I chose some of their beautiful agate and amazonite slices, cut points and rounds in fire crackle agate for the main beads and accented them with smaller rounds and rondelles.  It's very easy to put together also with easy knotting on waxed linen.
Ocean Moods Necklace

Look for Beadwork magazine online or in your favorite craft store.  It's chock full of great designs in stitched beading as well as a section on stringing (there are nine strung necklaces in this issue!).

Here it is in Beadwork in the "fast and fabulous" section:

Ocean Moods Necklace

Thanks for stopping by!

Friday, October 19, 2018

Autumn Earrings


I just have a little time left to participate in this month's blog hop over on the Earrings Everyday: We're All Ears site.  The inspiration from Erin is fall and she provided this wonderful set of fall leaves in all the glorious splendor that is autumn.

Three weeks later, and I missed the chance to participate in the fall leaves earring hop above.  But, no matter, I finally have a chance to create some new fall earrings and that's what is important.  Create when you can!

Here's one pair that I created with some copper wire - an abstract kind of leaf.
Abstract Leaves Earrings
Here's the link to take a peek at the other fall earrings that were created!  And, here's the reveal for the plaid inspiration earrings for this month.  I've still got time, maybe I can get another pair made!

Here's another pair that I made:
Hammered Leaf Earrings
For these, I cut leaves, hammered them, oxidized them and added Ranger antique copper patina over the top.  Serpentine and faceted glass rondelles are strung on copper wire.


Tuesday, September 25, 2018

Shirt Sleeve Pumpkins

Hi crafty friends!

Nothing makes me happier than re-using something old and worn out.  Lately, I have been using some of my hubby's old shirts in my designs.  I have a lot of plaids and pumpkins have been on my mind, so I thought I'd make some plaid shirt sleeve pumpkins.  

The shirt sleeves are perfect for a quick and easy stuffed pumpkin, since they are already a tube.  I cut two from this plaid shirt - one a little shorter than the other.  Then, I turn the sleeve piece inside out.  On one end, sew a running stitch around one edge with a heavy thread.  Draw it up and tie it.  Turn it inside out and stuff with polyester stuffing.  Then, sew another running stitch around the top edge.  Draw it up and tie the ends.  Push the center down along with the ends of the thread.  Find a short piece of stick for the stem, add glue to the end and push into the center.

Shirt Sleeve Pumpkins
Set them among the rest of your fall décor or place them in a grapevine wreath.  These are so easy even the kids and grandkids can make them.  

So save your old plaid shirts or check out your local re-use stores and make some shirt sleeve pumpkins!  


Friday, September 14, 2018

Happy Fall!

Happy Fall Y'all!

I love fall!  It adds a lot more color to the world - yellow and red leaves among the green, orange pumpkins, and ripe apples and tomatoes in shades of red.  The fragrances of fall add to the rich ambience - damp earth from an early shower, homemade jams and pies, and the rich odors of ripening grapes.

And, I love creating things to celebrate the season -

Here's a little sign for fall that I created for JOY Iron-on letters.


You can find all the details to make your own sign on the Creating with Joy blog.  Want to add a little more to this sign?  Add two more pumpkins - one with an "I" and one with a heart - to make "I heart fall".

These are small wood slices, so they will fit anywhere among the fall décor you already have on a windowsill or shelf.   And, the tiny leaves are die cuts made with a die from Spellbinders.

These leaves were part of the Wreath Elements in the Four Seasons set and were the perfect size for my pumpkins.  I love that die cuts work for so many crafts besides cardmaking!

Stop by the Creating with Joy blog for more fun fall and Halloween ideas.  Happy fall creating and decorating!

Tuesday, August 28, 2018

Painting with a Palette Knife

Hi!

While the baby was napping, I took the time to try out a new painting style.  I saw this recently on Make it Artsy, which is a fun show that hightlights all sorts of creative styles.  You can watch episodes free online.

This is my first attempt at painting with a palette knife.  The acrylic paint is thickened with modeling paste.  I started with one of my favorite subjects:  Sunflowers!


To get the texture in the centers, I used a straw!  Can't wait until my next creative 15 minutes or half hour to try this again, but, for now, the baby is awake!

Hope this inspires you to get out there and get creative.  Remember, it doesn't have to be perfect!

Monday, August 20, 2018

We're All Ears: Fabric-Inspired Earrings

Hi folks,

Today I'm taking the time to create some new earrings.  I love them; they are one piece of jewelry that I always wear.  And, they are quick and easy to create compared to other more extensive pieces of jewelry like a necklace.

The inspiration comes from the Earrings Everyday blog.  This month, Erin chose fabrics from Spoonflower.


So much fun!  Now, to pick one or two and create some earrings to go with the fabric.  Lots of fun ones, but I decided on the fabric on the bottom row, second from the left.  There are a lot of interesting mandala-type circles there and I thought I'd try to imitate that in an earring.

I found some buttons that were perfect to work with and used embroidery thread to sew a pattern in the buttons.
Mandala Earrings
These were a lot of fun to make.  I've got to try more of this on other filigrees.

Thanks for the inspiration, Erin!  Take a look at all the other lovely designs on Earrings Everyday.

Friday, August 3, 2018

Summertime Projects with Joy Iron-on Letters

Hi Everyone!

Hope you are having a great summer!

Here are my projects for the last three months using the iron-on letters from Joy.  All the instructions can be found on the Creating with Joy blog , where you will find my projects and those from the rest of the fabulous design team.

We spend a lot of time outside around the barbecue during the summer, so I created projects for the patio.  This is a quick and easy burlap pillow that is great for any of the patriotic holidays or just everyday.  It's so easy even the kids will enjoy it.  Make it patriotic or use their names or any short word.


This silverware caddy uses chalk paint on the canning jars as well as distressing over the letters and the caddy and tags.  I love the distressed look on the letters.

Upcycled Gift Box
This last project is an upcycled cheese box that I did for May, but you could use it for any occasion.  It would be a great box for a small gift such as jewelry.  Joy letters are great for any occasion, and you can color them in so many ways.  Here, I used ColoriQue inks to color them.

Drop by the Creating with Joy blog and see all the other wonderful creations from our design team!

Saturday, July 21, 2018

Faux Sea Glass Mobile

Hi all!

I'm here today for etchall® to show you another way to use their amazing products.  Today I'm using etchall® dip 'n etch.  It's one of my favorites because it's so easy to use.

I'm etching some interesting glass beads that I found at JoAnn's.
Such interesting shapes and sizes, aren't they?

I put them in a plastic cup and covered them with etchall® dip 'n etch.
I swirled the cup a couple of times to make sure the beads were exposed to the solution evenly and waited for 15 minutes.  Then, I poured the excess back into the bottle to use next time.  I rinsed the beads, then washed them is dish soap, rinsed again and dried them on a paper towel.

Now, these beads have the softened look of sea glass.

These would make some fun jewelry, but I love the look of a sea glass mobile, so that is what I decided to create.

I didn't have a piece of driftwood, but I did have some commercial driftwood pieces.  You can find them in the floral section of your favorite craft store.

I tied on lengths of C-lon cord to the wood piece with overhand knots and ladder-stitched the pieces of glass down the lengths of cord.  Ladder stitching is just putting the cords into the bead from opposite directions.  In between the glass beads, make overhand knots.  Then, on the ends, I tied on silver fish beads.

Here's my mobile hanging in my herb garden:
Faux Sea Glass Mobile
And, here against a fence:

So, if you have a yearning for a bit of the sea in your life, but can't make it to the beach to gather some sea glass, make your own with etchall® dip 'n etch.  It's so easy!


(As a member of the Etchall Design Team, I received product with which to work.  But, I wouldn't be a part of it, if I didn't love the product.  Hope you'll try it!)


Friday, July 6, 2018

Summertime design fun

Hi everyone!

This month, I'm taking some time to play around with some media and try a few new things that have been on my mind.

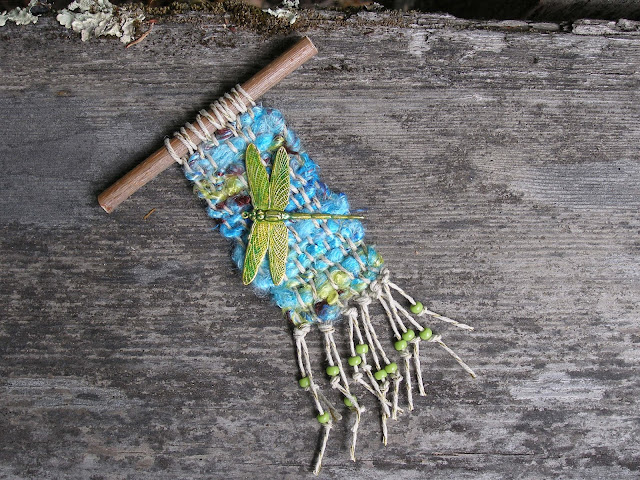
One of the things I've wanted to try is weaving.  I love the big wall hangings, but I wanted to try making some woven hangings small enough to wear.

Here's my first try.  I attached some hemp cord to a twig, taped it down to my work surface and wove some recycled sari yarn through it.

I like the unstructured look to it, but if I want to do more weaving, I think I'll have to make or buy a loom and learn a bit more about weaving.

I think I'll add something over the weaving, like this brass dragonfly that I colored with alcohol inks.
Then, I'll attach a cord or chain to wear it or just hang it up with some twine.  I'm definitely going to try some more of these.

Also on my long list of things to try this summer:  more copper jewelry with hammering and stamping, etching copper, enameling and mixed media jewelry.  We'll see what I am able to fit in between design work and grandkids!

What are trying this summer?  I hope you are taking some time to try new things and just play a little without thinking too much about the end result!  Enjoy!


Monday, June 25, 2018

Etched Cheese Board

Hi Everyone!

Today I am etching a cheese board with etchall® etching crème.  Cheese is one of my favorite things to eat.  I think I like it even more than chocolate!  Cheese is so versatile - you can eat it for breakfast, lunch or dinner - and, of course, snacks!  And, there are so many varieties!

I started out with a piece of slate, which I purchased at Michaels.


I used adhesive stencil letters to spell out the name of the cheeses.

Then, I taped around the letters with masking tape.  Since I didn't put the letters in straight lines, there was a lot of tape!

I added etchall® etching crème over the letters and waited for 15 minutes.  I scraped the extra crème back into the jar.  (It's re-usable!)

Here is how it looks so far.


Now, I'll etch the other corners.  Here it is!


And, I did it with etchall®!

Here's another to show it without the goodies.

This takes a little time, but it's a very easy process.  Wouldn't it make a great hostess or wedding gift?
What will you etch with etchall®?

Wednesday, June 13, 2018

Sunbonnet Sue Tissue Cover and Coasters

Hi Everyone!

Just a quick post to share my latest plastic canvas set designed for Herrschners.  I've always love Sunbonnet Sue and I'm happy to have a chance to design this motif again.  Hope you like it!

Here's the link to the kit on Herrschners.

Friday, June 8, 2018

Fast and Fabulous Tassels

Hi all!

Beadwork for August/September is out and I'm happy to announce that I have a necklace published in the Fast and Fabulous section.

In this issue, the Fast and Fabulous section is devoted to tassels - all kinds.  So whether you like thread, ribbon, chain, leather or mixed tassels, there is one for you. Elegant or casual, they've got them!  And, you'll recognize the designers - Tamara Honaman, Fernando Dasilva, Nealay Patel, Debbie Blair and more - I've admired their work for a long time.

Here's the one I made with strips of my husband's old shirts, yarn, sari silk ribbon, chain and a little leather.  I found my bead cap in the plumbing aisle of my local hardware.  So, with the copper cap and the recycled bits in the tassel, the editor named it Plumb Scrappy!  So punny!  

Plumb Scrappy
I love to create with recycled materials and use up some of the bits in the cupboards and bins.  What do you have that you can create with?  I hope this idea inspires you.  And, do check out Beadwork and see all the beautiful designs.

Here are the tassels in an article from Interweave.


<em>Beadwork</em>, August/September 2018 Fast & Fabulous: Tassels
And, here is their photo of my tassel:

Beadwork August/September 2018


Wednesday, June 6, 2018

Pretty Palettes Challenge for May

Hi there!

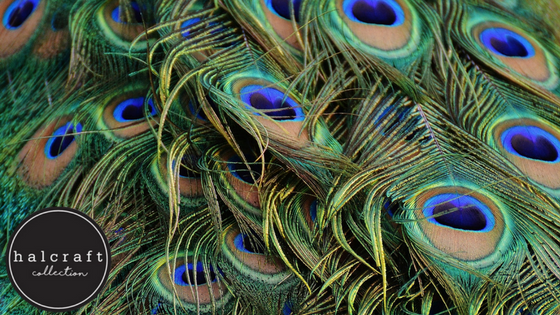
Today I'm playing along with the Pretty Palettes challenge on the Halcraft site.  This Last month our inspiration was peacock feathers.


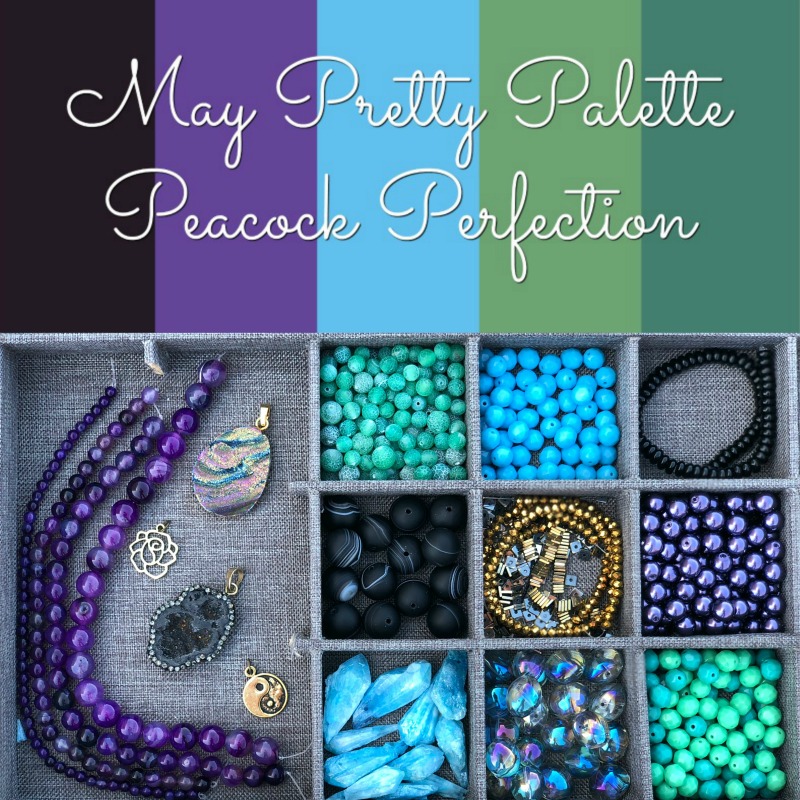
Here are the beads Molly Schaller chose for this month:


I ordered some of these - the purple dyed agate round, the green matte fire crackled agates, and the aqua dyed quartz stone drops.  And, of course, a few more that struck my fancy!

Well, I've been working on this for about a week now, trying to come up with something that I like.  I thought alcohol inks would be interesting, so I played with those for awhile.

Fun, but not exactly what I had in mind for a peacock.  It looks more ocean-inspired to me.   I need some purple ink!  So, I decided on a tassel.  I've been making lots of tassels lately - one of which will appear in Beadwork later this summer.

Here is my peacock-inspired tassel.
Peacock Tassel
These are fun and easy to make and I love the sari silk and sari yarn mixes.  (I got these at Darn Good Yarn.)  This is a little long to wear (for me), so I might just hang it on something for a fun splash of color - maybe under the umbrella on the patio.

Here are the steps to create your own tassel:

Cut lengths of sari ribbon and sari yarn.  For the above tassel, I cut 7 pieces of ribbon and 6 of yarn in 12" lengths.  It's a messy tassel, so you don't have to be exact.

Fold the strands of yarn in half and wrap a piece of 22 gauge wire about 7" long around the center of it.  Cross the wire at the top leaving one end longer.  Make a wrapped loop where the wires cross wrapping with the short end.


Slide on a large bead cap or two and a bead(s) and make another wrapped loop.

This bead cap has been painted with alcohol inks.

Trim any ends and you are done!

Check out the Halcraft site for more beady fun and join the community.

I'm so late with May that June's Pretty Palette is already out!  Looks like another yummy palette just right for summer!  Happy creating!