Pages

Showing posts with label TierraCast. Show all posts

Monday, August 12, 2024

Turquoise Set

 Hi Everyone!  Thanks for following along.

I'm finally getting back to creating jewelry with some of the stones and beads that I've collected in the past few years. 


This turquoise is from the Kingman mine in Arizona, which we visited five years ago.  I combined it with faceted apple jasper rondelles (Dakota Stones), turquoise rondelles (Toltec Turquoise) and smaller red jasper rondelles (Hobby Lobby) along with antique copper spacers (TierraCast) and copper clasps (Patricia Healey). The bracelet and necklace are strung on Soft Flex Beading Wire in Butterscotch Imperial Topaz color.  


Tuesday, May 5, 2020

Tree of Life

Hi Everyone!

Thanks for stopping by!  Hope you are all enjoying the magnificent spring we are having.  We are warming up in Sonoma County and the roses are blooming as fast as they can.


The last couple of days, I have been trying my hand at making a wirework Tree of Life.  Here are a couple of the results.

This was my first attempt:

It was a very small space in which to work, and it's hard to get the wire tight around the ring though I love the texture and color on the TierraCast ring.

The next time I researched Pinterest (Search "wire tree of life").  There are some amazing wireworkers creating so many variations.  I found a tutorial on Instructables to use as a guide.  On this pendant, I left some roots before twisting for the trunk.

This has a bigger diameter, about 1 1/2".  And, I used smaller chips.  It's 16-gauge wire for the ring and 24-gauge for the tree.  I'm excited to try another one with an even larger diameter.  There seems to be no end to the possibilities with this.  

What are you trying that is new to you?  It's a great time to explore.  

Friday, March 27, 2020

Tutorial: Fringed Rope Earrings

Hi crafty friends!

Here's an easy tutorial for the earrings that I made last month.  Thanks for your encouragement Crafty Hope!  Stop by her blog for more crafty goodness!


I made these with rope from Hemptique:

I used the natural but it comes in a lot of different colors and combinations.

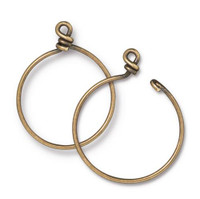
For the wire hoops, I used TierraCast Charm Keepers in the 32mm size.  You could also make your own hoops with some heavy wire.

Charm Keeper Hoop 32mm inside diameter 15 gauge wire, Oxidized Brass, 6 per Pack

The other materials are 24 gauge wire in Vintage Bronze and a pair of brass ear wires.

For this tutorial, I'm using hoops that I made myself from 16 gauge copper wire.  I hammered them after I made the hoop to give it some texture and harden the wire.


Cut 2 1/2" lengths of the rope.  Cut about 4" of the 24 gauge wire.  Fold the rope over the hoop and wrap the 24 gauge wire close to the fold.


Trim the wire and press the ends into the rope.  Unravel the rope completely.


Keep adding fringe until it is as full as you like.

Brush and fluff the fringe and trim any stray ends.

Pretty easy, right?  This also makes a fun pendant as well as earrings.  Have fun with it!

Sunday, February 16, 2020

Fringed Rope Earrings

Hi Everyone!  Thanks for stopping by.

I had time for some fun this week and created these earrings using Hemptique rope and TierraCast hoops.

Fringed Rope Earrings
Should I write up a tutorial for these?  Let me know in the comments.

Happy Creating!

Friday, February 1, 2019

Project Embellish Part Two

Hi Everyone!

I wanted to share the results of the Project Embellish Challenge at the AFCI show in Phoenix this past month.  (Can you believe it's already February!)  I have to tell you that it was probably the most exciting thing to happen to me in awhile, so I may be talking about it all year! I am so grateful for the opportunity.

Here is my roommate and I at the show before the challenge:


We were situated on the show floor in a large booth that had places for all six designers around the edge of the rectangle.  The judges sat at one end and Brenda Schweder was in the center along with Susan LeGuyader, Queene Bead Design, who helped us out with 10 minute lessons on the jig if we desired.

Here's a photo of us contestants and Brenda after the challenge.
Project Embellish Challenge
I was in such AMAZING company for this challenge.  Next to me is Jen Cushman, then Monica PenaBrenda is in the center.  Next to the sign is Kymona Tracey, then Cat Kerr, then Carol Foldvary-Anderson.  Take a look at their work.  They are wonderful designers and it was a pleasure to meet those whom I didn't know.

We had to create a necklace in 2 1/2 hours and use elements from each of our sponsors, who were:

Now That's a Jig, the amazing jig system that Brenda Schweder invented
Beadalon, who provided us with Artistic Wire
ImpressArt. maker of products for metal stamping
TierraCast, who makes findings for jewelry making
Xuron Corp., maker of the tools we used
Craftoptics, makers of magnifying eyeglasses
Beads Baubles and Jewels, a popular jewelry-making show
Deflecto, maker of storage caddies and organization systems

We had to use the jig, wire, stamped metal pieces, and TierraCast charms and create a piece in the theme of Charm and Whimsey.  We were judges by three judges, who walked around and observed us as we worked (pressure!).  They were Rita Panulla, from TierraCast, Tamara Honamon, from Interweave, and Tracy Gonzales, from TierraCast.

Here's a link to the finished necklaces.  They were all amazing (I know I'm using that word a lot!).

Here's a photo of my finished piece:
I created in an ocean theme.  I created waves and the necklace with wire on the jig.  I stamped the metal pieces with the words "Under the Sea" and added some patina.  I used the TierraCast charms in two ways - to hold the ribbon that I attached to the wire and hanging in the sea waves.  I added ceramic fish, turtle and starfish beads, blue and green glass beads and some wood pieces.

In addition to using all the elements from the sponsors, Brenda threw in a mystery element that we had to incorporate into our design.  The mystery element was an antique postcard.  I wasn't sure what to do with it.  My postcard had roses and leaves on it and didn't go with my colors or theme.  Time was running out!  Then, I had the idea to cut up the postcard and make rolled beads with it.  They looked like messages in a bottle or a rolled treasure map.  Whew!  To finish the necklace, I attached ribbon and made a toggle with a crystal and loop.

I was delighted (and, amazed!!) to be awarded Runner Up!  And, again a big thank you to the sponsors from which I received this prize.


Thanks for stopping by!  This was so much fun and I hope AFCI will bring it back next year.  These necklaces were auctioned off and the money generated was donated to Beads of Courage.  This charity provides kits for children in hospital with serious illnesses.

Wednesday, November 28, 2018

Pretty Palettes Reveal for November

Hi everyone!

Hope you all had a wonderful Thanksgiving!  We celebrated with part of the family out at the old ranch house.

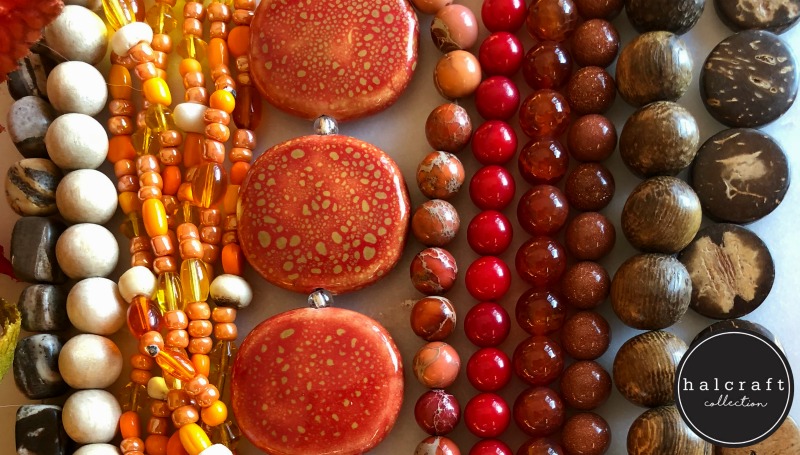
This month the Pretty Palettes from Halcraft and Molly Schaller is full of beautiful fall color and pumpkin spice.


I chose a few of these yummy beads for my own.  Ok, almost all of them!

Here is one of the necklaces that I created from zebra jade nuggets, some rosewood tubes and the stag pendant.  I added a hammered antique copper ring and spacers from TierraCast and a leather tassel and tied it together with brown waxed cord.
Stag Talisman Necklace
I imagine some ancient hunter wearing this necklace in hope of a successful hunt.  I love the primitive look of this combination of beads and fibers.

Here it is showing the way I made the clasp:
I drilled through the bead crosswise so that I could secure it as a toggle.  Then, I tied a loop in the waxed cord for the other side of the clasp.  I also wrapped the loop on the pendant with cord before tying the tassel.

Then, with the beautiful seed beads, ceramic squares, fire agate and imperial jasper rounds, I created another necklace.  This one reminds me of colorful Indian corn and pumpkins.
Corn Tassel Necklace
I love the seed bead mix and wish I'd bought some more of them!  Such a fun combination of colors and shapes!  This photo doesn't do them justice, but it was too rainy outside for an outdoor photo.

Here's another photo that's a little brighter:


Be sure to check out the Reveal for this inspiration and see what Molly Schaller and all the other members have created on the Halcraft facebook group page. And, go here for Halcraft's great selection of beads.