Pages

Sunday, December 18, 2016

Last Minute Gift Idea: Leaf Earrings

Hi Everyone!

Are you ready for the holidays?  Do you need a last minute gift idea for a friend or family member?  You've come to the right place!

We invite you to join the Last Minute Gift Ideas blog hop with a great group of talented designers.  Hop from blog to blog and find easy, fast and amazing last minute gift ideas.


You can also win a great prize!  Visit all the blogs participating in the hop, leave a comment, and you can win a $100 Visa gift card!

Earrings are always a great gift.  Here's some mixed media ones that will be sure to be a hit.  Leather is such a popular jewelry medium right now, and all you do to create the leaf is use a die cutter.  You can find the tutorial here.
Leather Leaf Earrings
 
While I really like these in tan suede and dark red, I wanted to try a different color to show how versatile this idea is.  Here's a necklace I made using turquoise leather.  For more on this necklace, go to this link.

Blueberry Tassel Necklace

Blueberry Tassel Necklace Close-up
As you can see, it's a very versatile design idea.  With so many colors and textures in leather and suede, it's easy to create your own version for any occasion. 

More ideas - try a different die cut, use leaf or other fancy chain, use pre-strung dangle chain, add a smaller leaf, a filigree stamping or other layer in between the leaf and the chain.

You have plenty of chances to enter to win a $100 Visa gift card each day of the hop, on any of the participating blogs.  Everyone is eligible to win whether you're in the U. S. or international.  The prize winner will be announced on Christmas, December 25, on einatkessler.com

Here's the hop list:

Ola Khomenok
Patti Hodder
Kathy Clement
Alexandra Morein
Sandy Trefger
Gloria Stengel
Pam Bray
Einat Alagem
Keren Tamir
Terry Ricioli - YOU ARE HERE!
Katelyn Grosart
Einat Kessler
Susan M. Brown
Steph Ackerman
Eileen Hull
Rita Barakat
Mahe Zehra

In order to win, leave a comment answering the question - "What is your favorite 'can't live without' craft supply or tool?"
a Rafflecopter giveaway

Happy Creating and Happy Holidays!
Terry


Saturday, December 10, 2016

Winter Woods Necklace

Hi Crafty Friends!

The winter issue of Craft Ideas is out in its digital edition and will be on newsstands soon.  It is filled with all sorts of great crafts for winter making and decorating.  Embroidery hoop ideas, how to use those coloring pages and ideas for decorating the kids' rooms are among the many ideas available.
Craft ideas
Of course, there are some jewelry designs for those of you who love beading.  Among them is one of mine!
Winter Woods Necklace
I love to mix different elements in my jewelry.  Here there are two different ceramic beads, three kinds of gemstones, glass daggers and wood combined with natural brass chain and spacers.  I tried to evoke a wintry scene with this piece - a view of snow-decked pines and firs, rocks half hidden under caps of white.  And, I'm pleased to say - the photo is mine, too.  I found the perfect old board with it's grays and peeling white and green paint.

Check out Craft Ideas; it's always full of great crafting inspiration!
Happy crafting!
Terry

Friday, December 2, 2016

Pretty Palettes November Challenge

Hi friends!

Today I'm designing with the Pretty Palettes November Challenge. Erin Prais-Hintz held a photo contest to come up with this month's palette.   Here's the color palette generated from the beautiful photo of lamb's ears and maple leaves by Susan Conaway.  Follow the link to her blog, which is filled with gorgeous fiber art!
nov2016

Erin chose these beads from the Bead Gallery(R) line at Michaels.
nov-2016_beads_edited-2

Here's what I picked up at Michaels.
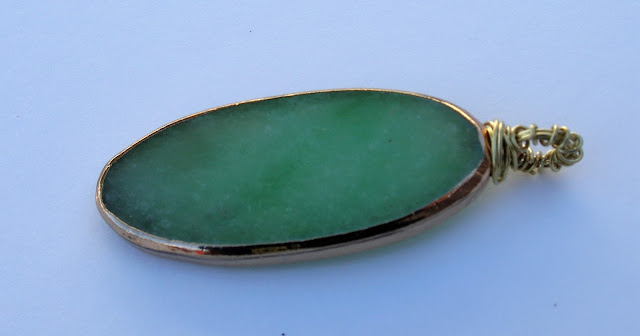
My favorites are the first strand; it's green banded agate and combines almost all the colors in the palette.  I also found a pendant that looked just like a lamb's ear leaf.  I added some fire agate rounds, faceted Czech glass in greenish turquoise with flecks of brown, and gold spacers.  Although I didn't pick up quite the same shades in the palette, the colors are all in the photo.

The first thing that I did was remove the bail from the pendant.  I used brass wire to make my own wrapped bail. 

To embellish the pendant, I added an antique gold oak leaf tied on with waxed linen with a few beads on the ends.  Then, I strung the pendant on a strand of the Czech glass turquoise beads.  I added another strand of the banded agate and fire agate and attached them to an antique gold rope-textured jump ring.  I tied red deerskin lace to the jump rings and tied them at a length that I could slip over my head.  I considered gold chain instead of lace, but I like the informal feel of the leather. 
Banded Agate and Turquoise Necklace
Not a very inspired name, but it's the best I can come up with for now!

Here are the earrings:
I happen to have both lambs' ears and maple leaves in my yard, so I couldn't resist placing them in the photo!

Thanks for the inspiration, Erin and Susan!

Wednesday, November 16, 2016

Rinea Foil Blog Hop

Hi Crafty Friends,

Today, the designers from the Designer Crafts Connection are designing with Rinea paper-foil.  It's a paper-foil combination with a paper core sandwiched between two layers of foil.  This gives it more durability and stability.  You can cut it, roll it, emboss it or fold it and it holds its shape.  It comes in some beautiful colors and finishes. 

I tried a number of different things with this paper-foil.  Here's a snowflake ornament:
Snowflake Ornament


To make the ornament, I die cut 3 snowflakes.  I folded them in half and glued the creases together.  On this one, I glued a loop of nylon thread for hanging in between the layers.   You can also glue eye pins into the ends.  With an eye pin, you can add a bead or connect lots of snowflakes!

TIP:  When die cutting, place a piece of cardstock in between the foil paper and the cutting plate.  The foil picks up impressions from the cutting plate and the cardstock keeps that from happening.  I tried a piece of notebook paper at first, but it isn't thick enough to work.

Here's another dimensional snowflake with silver and gold papers.  It is three snowflakes glued together with the arms on the gold ones bent up.  I glued Dew Drops from The Robin's Nest to the ends and in the center and glued a loop of nylon thread under the drop on one side.
Silver and Gold Snowflake with Dew Drops

I tried some origami also.  I found that the simplest patterns work the best.

Boxes work well with this paper.  Here's one with red/gold double-sided paper.

Here's an origami flower (Cherry Blossom) with some die cut leaves and Dew Drops layered and glued in the center.
I really like how easy it was to add veins to the leaves.  This would look nice on a gift box or bag.

Here's a tree I made.  It's very simple and would look great on a card or as an ornament.
Tree with Dew Drops
Another TIP from my experience:  Practice with paper first until you know where you want to make the folds, then work with the Rinea foil paper.  The paper-foil will show all your folds!

Check the Designer Crafts Connection blog to see what the other designers have done with this amazing paper-foil.  And, enter the giveaway for some Rinea paper-foil of your own!  Here's what you could win:


(I received samples of Rinea paper-foil in order to create these designs.  Thanks Global Crafting!)

Monday, October 24, 2016

Harvest Plaque

Hi friends!

Ready for some quick and easy fall decorating?  JOY Iron-on letters make it easy to create memorable designs for any occasion!
Harvest Plaque
Go to the Creating with Joy blog for all the details on what you'll need to create this plaque.

Basically, you paint a canvas with a wash of orange.  I went around the edges with full-strength orange paint (Jack-O'-Lantern Orange from DecoArt.)  Cut out a nice fall napkin and decoupage it to the canvas.  I tore the napkin edges and inked them (Ann Butler's ColorBox(R) Crafter's craft ink in Canyon).  Then, I glued burlap ribbon to the canvas.  I pulled threads from the edges of the burlap ribbon and inked the edges with Canyon.

I added JOY letters across the napkin.  To paint the letters easily, stretch a piece of tape across a box sticky side up.  Adhere the letters to the tape and paint!  It's so easy when they don't move around!  Here's another word that I thought about using.  You can use your favorite fall word or saying.


Here's how the plaque looks after the word and the ribbon.
Before adding the leaves
I die cut some leaves from scrapbook and amate papesr, inked the edges and added splotches here and there.  I also folded and wrinkled the leaves a bit.  I arranged them and glued them down, then added a twine bow.

So easy - you can make one for any season!

Happy Crafting!
Terry

(Disclaimer:  As a member of the design team for JOY letters, I received monetary compensation and iron-on letter samples to use in my designs.)


Tuesday, October 18, 2016

Amazing Casting Products Blog Hop

Hi all,
Today I'm working with a couple of products new to me provided by the Alumilite Corporation - Amazing Mold Putty and Amazing Clear Cast.  I was provided samples to try and to use in my design work as part of a blog hop with Designer Crafts Connection.

I had never used an epoxy mold-making compound before and found Amazing Mold Putty very simple to use.  I have an old desk with carved knobs, so I decided to make a mold of one of those.  It was ready in minutes and I was ready to mix the Amazing Clear Cast epoxy resin to go into the mold.  One thing I noticed when I molded this knob - the Mold Putty picks up everything - every defect in the knob - even the dirt!  Next time, I'll brush the crevices!
My first mold
As with all epoxies, it's a two part compound that you mix together.  Then, you can add color.  I decided to add a drop of acrylic paint (Buttermilk).  It wasn't enough paint to achieve the opaque effect I wanted, but it has a nice antique look. 
Clear Cast with yellow acrylic paint

I had extra Clear Cast, so I set up some bezels and proceeded to fill them.  I added a couple of brass pieces to the first one, but it was too soon and they sank.  Not so good.  Then, I decided to add more paint to get the opaque effect I wanted.  I added some blue acrylic paint and filled a couple more bezels.  This, I liked.  They look like enamel.

Here's one:
Clear Cast with blue acrylic paint
After the resin set up, I made a necklace with the door knob resin piece.  First, I added some Antique Gold Rub 'n Buff(R).  This made it look even more like an old antique piece, so I found crazy lace agate beads, ribbed howlite rounds and natural brass chain to coordinate with it.  I found that a bead reamer will make holes in the resin, which was something I didn't know. 

Here's my necklace:
Antique Flower Medallion Necklace
Here's another shot:
Antique Flower Medallion Necklace

There is a giveaway of these great products.  Here's what you get if you win:


Be sure to go to the Designer Crafts Connection blog to see all the "Amazing" designs and to enter the contest!

Friday, October 14, 2016

Pumpkin Earrings

Hi all,

I love pumpkins, and looking around Pinterest, I saw some fun pumpkin earrings.  So, when I ran across some ribbed orange beads at my local bead shop, I knew what I wanted to make.

These ribbed howlite beads came in a variety of colors on each strand, so I picked the orange and white ones out for the earrings.

I strung them on a long head pin (3") so that I could add a tendril to the top.  Besides the bead, I also used an antique gold bead cap.  If the bead is large, you need a spacer at the bottom, too.  And, earring wires, of course. 

Use the extra length on the head pin to make a tendril by wrapping it around your round nose pliers.

You can make them in the traditional orange:

Or, try some white pumpkins:

I love the way the dye in the crackling of the howlite looks like real pumpkins.  These are just the thing to wear this month and into the next!  They make a great gift, too!

Wednesday, September 28, 2016

Frankenstein Lantern

Hi Crafters!

It's time for some Halloween fun with etchall®!  I had some square vases that I thought would work well for some Halloween characters, especially one who has a square-ish head - Frankenstein! (Or, Frankenstein's monster if you want to get technical!)

This Frankenstein lantern can light up the night on your porch or table.  And, etchall® makes it so easy to create because the etched surface of the glass creates a surface to which the paint can adhere.

Here's how I did it.  The vase:

I etched each side with etchall® etching crème.  You can see that my crème has aged to a caramel color.  It still works fine.  Follow the directions on the bottle and let it sit for 15 minutes.  Then, scrape off the crème and put it back in the bottle - it's reusable!


Here it is after etching ready for painting.

After etching, I painted it with a transparent golden green paint.
It's a perfect color for the Frankenstein monster.

Then I painted the hair and eyes.  I added lines for the nose, mouth and scars with a black pen.
Frankenstein Lantern
Here's a side view:

I looked around the house and my craft room for something that would work for the bolts on the side of his head.  After a hunt around the kitchen, I found the perfect thing - a cork, which I cut in half and painted black.  I glued them to the side of the vase with gem glue.

Add a tea light inside the lantern, and you are ready to go!  Or, fill him with candy for those trick-or-treaters!

Need more ideas? How about a Jack O' Lantern?  Or, a scarecrow?  Try a few different jar shapes and group them together for a fun Halloween display!  Don't forget your etchall!

Tuesday, September 20, 2016

Gel Press Blog Hop

Hi everyone,
Today I'm part of a blog hop where we are using Gel Press printing plates to create prints.  This is a product new to me, and I'm having a lot of fun trying it out.

I received a 5x7 plate, which is a great size for card making or mixed media.It took a few tries to figure out how much paint to spread on the plate.  At first, I used too much paint.  The next time, my paint dried up before I could print.  It was a warm night.  The next day, things went better. 

Here's one I created in a fall theme.  I used three colors of acrylic paint (red, yellow and orange) and some leaf stamps.  I can see making place cards for fall dinners with this method.
Leaf Stamps
Here's another print.  This time I used a birdcage stencil.  I put down a layer of blue acrylic paint.  I laid the stencil on one side and used a sponge brush to add white paint around and through the stencil.  I think I'll go back to this and add some definition with pens.
Birdcage Stencil
Then, I decided to try bubble wrap pressed into the paint.  This would make a great background for a couple of tropical fish.
Bubble Wrap
And, I found in my experimentation that nothing needs to go to waste.  Some of the prints I made with gaps or too much paint made perfectly nice fall leaves when run through the die cutter.  And, these leaves are great everywhere!
Fall Leaves
Thanks, Gel Press!  I really enjoyed playing with your reusable gel printing plate.  Can't wait to try more ideas!

Saturday, September 17, 2016

Fall Doorhanger

Hi Crafty Friends!

It's almost fall, and one of my favorite seasons for decorating the house.  You can't beat the array of colors - rich reds, brilliant yellows and warm oranges along the comfy shades of brown.

Here's a project that I created for JOY using their iron-on letters.  For all the instructions, head on over to the Creating With Joy blog.  These particular letters come with an adhesive backing so that they stay in place when you iron them onto fabric.  But, for this craft, I used the adhesive without ironing.  It's really quick and easy!

Fall Doorhanger
I want to mention one of the techniques that I used for this sign.  I used a watercolor look, but the watercolors that I used are Rit dyes!  I painted the canvases with Rit® dye in Tan.  Then, I added some color in the middle and around the edges with Cocoa Brown.  I dipped the letters in Tangerine and dabbed some of the brown here and there on the letters.

This is a great way to color your JOY letters - just dip and dry.  And, Rit® dyes come in just about every color imaginable!  And, you can mix them to create more shades!

Have fun creating with fall colors, JOY letters and Rit® dye!


Wednesday, August 31, 2016

Pretty Palettes Challenge for August

Hi friends,

The Pretty Palettes inspiration for August is a wonderful color palette based on a basket of blueberries.  Beautiful!
{ berry hues } image via: @djmight
Here are the beads that Erin Prais-Hintz selected for the color palette.aug2016_beadspalette2

Here are the beads that I selected.  I picked up Bliss Beads from Halcraft at my local Joann's.  My time is limited right now since we're in the midst of our annual harvest, not of blueberries, but of grapes, and Joann's is closer.
And, here's the necklace that I created with them.  I tried to capture the look of a cluster of ripening blueberries in this simple tassel necklace.
Blueberry Tassel Necklace
Here's a close-up to show the tassel.
Blueberry Tassel Necklace


The larger blue beads are the ripe blueberries and the smaller ones are in various stages of ripeness! 
I added cobalt patina from Ranger to some of the bead caps.  I'd like to add a pair of earrings when I get some time - maybe in October!

Thanks for the challenge, Erin! 

To take a look at everyone's scrumptious blueberry designs, go to the Pretty Palettes::August Reveal.