Pages

Showing posts with label fall. Show all posts

Wednesday, August 16, 2023

Fall Designs in Plastic Canvas

 Hi folks!

Fall is one of my favorite times of year and I love to design in fall colors.  Here are a couple of fall and harvest designs that I created for Herrschners.

This is another porch board:

Happy Fall Porch Board

And, here is a view through a window of an apple orchard and an old red pickup:

Apple Harvest Wall Hanging

You can find these kits now on the Herrschners website under plastic canvas.

Friday, September 17, 2021

Harvest Truck Wall Hanging

 Hi Everyone!

Are you in the harvest decorating mode?  Here's a cute plastic canvas pickup truck that will fit the bill!

Harvest Truck Wall Hanging

This a design I did for Herrschners, so you can find it on their website: herrschners.com in the Plastic Canvas section.

I wish I had time to stitch it myself!  I just love the corrugated metal background.  Love that country style!


Friday, December 2, 2016

Pretty Palettes November Challenge

Hi friends!

Today I'm designing with the Pretty Palettes November Challenge. Erin Prais-Hintz held a photo contest to come up with this month's palette.   Here's the color palette generated from the beautiful photo of lamb's ears and maple leaves by Susan Conaway.  Follow the link to her blog, which is filled with gorgeous fiber art!
nov2016

Erin chose these beads from the Bead Gallery(R) line at Michaels.
nov-2016_beads_edited-2

Here's what I picked up at Michaels.
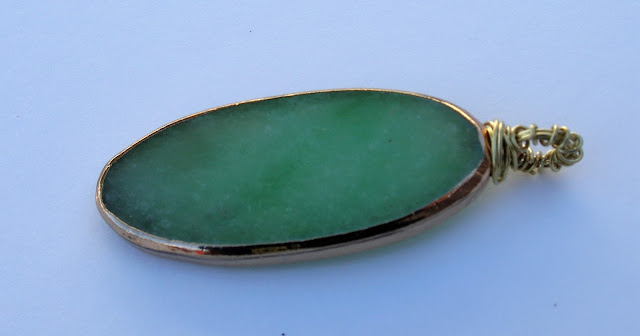
My favorites are the first strand; it's green banded agate and combines almost all the colors in the palette.  I also found a pendant that looked just like a lamb's ear leaf.  I added some fire agate rounds, faceted Czech glass in greenish turquoise with flecks of brown, and gold spacers.  Although I didn't pick up quite the same shades in the palette, the colors are all in the photo.

The first thing that I did was remove the bail from the pendant.  I used brass wire to make my own wrapped bail. 

To embellish the pendant, I added an antique gold oak leaf tied on with waxed linen with a few beads on the ends.  Then, I strung the pendant on a strand of the Czech glass turquoise beads.  I added another strand of the banded agate and fire agate and attached them to an antique gold rope-textured jump ring.  I tied red deerskin lace to the jump rings and tied them at a length that I could slip over my head.  I considered gold chain instead of lace, but I like the informal feel of the leather. 
Banded Agate and Turquoise Necklace
Not a very inspired name, but it's the best I can come up with for now!

Here are the earrings:
I happen to have both lambs' ears and maple leaves in my yard, so I couldn't resist placing them in the photo!

Thanks for the inspiration, Erin and Susan!

Monday, November 4, 2013

Thankful Heart - Designer Crafts Connection Blog Hop

Hi Everyone!

Welcome to another first Monday of the month Designer Crafts Connection Blog Hop!  This month we're creating thank you gifts.  I've created a Thankful Heart plaque that you can give as a gift or use to decorate the house for Thanksgiving or all through the year.  You can make this as a family or with a group.
 
Thankful Heart 


I've made it a reminder of a few of the people and things for which I am thankful.  You'll have your own things for which you are thankful so you can individualize the heart with names of loved ones or other words you like.

For this project, you'll need:

8x10 canvas
DecoArt Americana acrylic paint in Jack-O'-Lantern Orange and Milk Chocolate
Off-white cardstock and a word processing program/computer
Raffia-covered wire, about 1 foot
Small dry sticks
Tacky glue
Paintbrush, pliers, sponge

Instructions:

1.  Mix some orange and brown paint and paint the canvas.  Leave the paint streaky and uneven.  While the paint is still wet, press the sponge on the paint using different angles to create more texture.

2.  Using a word processing program and your computer, make a sheet of words describing things or people for which you are thankful.  Space them so that you can tear them apart.  Change the fonts and sizes on some of the words for interest.  Print them out on cardstock and tear the words apart into different shapes.  Thin the brown paint and randomly paint the words.  Let dry.

3.  Break the sticks into pieces to make the letters for the word "Thank".

4.  Using the pliers and your fingers, shape the wire into "ful".  For kids and seniors, use yarn instead of the wire.  Write the "ful" in glue, then follow it with yarn. 

5.  Glue the word "Thankful" as shown or as you like.

6.  Glue the paper words into a heart shape.

That's the basics, but as usual, you can change the project around to make it as individual as you are! 

Thanks for stopping by!  
Terry


Thursday, September 5, 2013

Carnelian Tassel Necklace

Hi Crafters!

I love fall and I love designing with fall colors.  Here's a necklace that I designed for Crafts 'n things for their Fall 2013 issue.   It's a perfect addition to your fall wardrobe!

This necklace is a combination of carnelian, poppy jasper and yellow jasper along with antique copper findings from TierraCast.  There are some stones that I keep returning to in my designing.  Jasper and carnelian always seem to call to me!  Which stones call to you in your designing?
Carnelian Tassel Necklace

Happy crafting with warm, rich fall colors!
Terry

Monday, October 1, 2012

Leaf Mobile

Hi Crafters!

It's the first Monday of the month and it's time for...you guessed it--The Designer Crafts Connection blog hop!  This is the place to see new fall crafting ideas from your favorite designers. 

The beautiful colors of fall leaves always inspire me this time of year, so I have a quick and simple way to create a fun Leaf Mobile. 

First, collect and wash plastic lids from food containers.  These are so easy with which to create different crafts because you can cut shapes from them with a pair of scissors.

Cut the ring off the lid.  Then, use a natural leaf as a guide and cut a leaf from the center of the lid. 

Punch a small hole in the leaves with a paper punch and string them on a piece of twine.  Knot to hold and tie the other end to a piece of wood.  Or, you can hang them onto tree branches in your yard.  They're wateproof!


Leaf Mobile
Designed by Terry Ricioli

They are lovely, fluttering in the breeze, but you could also use them in a wreath.  Or, write names on them and use them for place cards or other table decorations!  I'm sure you'll think of more of your own ideas, and that is what crafting and creativity is all about!
Happy Fall Crafting!
Terry

PS  There will be a blog hop later this month in which you can win a great prize from Makin's Clay.  Here's a photo of all the goodies that they are offering.  It's worth over $100 (retail). 

Here's the link for the contest.  The link will be active between October 13 and October 24.  http://makinsclayblog.blogspot.com/2012/09/makins-clay-blog-hop-contest.html  
Be sure to check it out!

Monday, August 20, 2012

October Sunset

Hi Everyone!
It's the middle of summer, but the fall magazines are already coming out.  And, I'm working on designs for next spring!  It's no wonder I don't know what month it is!  That's my excuse anyway!

Here's a design of mine appearing in the fall issue of Jewelry Stringing.  The magazine is packed with wonderful designs to coordinate with your fall outfits.  My design is made with glass beads that are made to look like stones with all sorts of lovely colors swirled through them.  You can find them at your local JoAnn's.

Enjoy the rest of your summer while creating jewelry for fall!

Happy Crafting!
Terry

Friday, October 22, 2010

Sizzix Blog Hop Sneak Peek

Happy Fall!

And, yes, it finally feels like fall here in central California. It's raining and the leaves are falling everywhere! It's time for the broom and the rake. I love the wonderful fresh smell of the air and the musty dampness of the earth as I rake up the leaves. The colors this time of year are so remarkable. And, the loss of leaves surprises me with new textures and silhouettes as the bark and branches of the trees are exposed to view. The season beckons me to get out of my cozy craft room and go for a walk in the woods to see the changing venue.

But, in the meantime, back in the cozy craft room, I'm having a great time decorating my 3D House. It's the first die cut in the Sizzix Triple Play Blog Hop. Here's what it looked like when I got it in the mail:

In a couple of days, I'll show you how it looks constructed. I love working with 3D. I've made a lot of 3D objects in plastic canvas, so this is right up my alley! I can't wait to see all the little houses created by others on the blog hop. There are just so many ways to go with this little house.

Until next time, happy crafting!