Pages

Sunday, May 20, 2018

We're All Ears - Calder Inspired Earrings

Hi Everyone!

Today I am creating along with the We're All Ears monthly challenge on the Earrings Everyday blog.  This month the inspiration is the art of Alexander Calder.  Thanks, Erin Prais-Hintz, for the inspiration.
Rouge et Noir, 1955, Alexander Calder

We are trying to capture the movement and momentum of his kinetic sculptures in a pair of earrings.

This is perfect for me as right now I am in the midst of teaching lessons on Calder to the homeschool group for which I am an art tutor.  So far our group has created stabiles and worked with clay.  Next week, we will create a circus in wire and recycled materials inspired by Calder's circus.

I have always admired Calder's mobiles, but I have learned so much more about his life and art as a result of teaching about him.  Did you know he created jewelry as well?  Here's an example of some of his pieces:

More inspiration!  I love the hammered brass.

So, with Calder in mind, here's a pair of earrings that I created:
"Got that Swing" Earrings
These have a really nice motion to them and swing as you walk, hence the name I chose.  They also have a little rocking movement as the wire in the spacer is smaller than the hole and slips back and forth.  I have combined silver metal spacer bars, gold beads and spacers and gunmetal head pins.
"Got that Swing" Earrings
Such a great inspiration this month.  Thanks, Erin!  The work of Calder is enough inspiration for a lifetime!  I am working on some hammered brass wire earrings, too.  I hope to show you those soon!

Hope you are inspired to create!
Terry


Thursday, May 17, 2018

Garden Wedding Bridesmaid Jewelry

Hi crafty friends!

Sometimes, life doesn't go as planned.  A few weeks ago, I became part of a new design team with ColoriQue, and I was super excited about it.  Here was my first post - an upcycled tassel.
I had so much fun creating this tassel from my husband's old jeans and shirts, leftover bits from my sewing basket and a few beads.  ColoriQue works so well in coloring the thimble and the other bits like the buttons, snaps and safety pins.  I really like that I can use old clothing in a new way.  Think of all the old clothes that you can upcycle - I think one from scraps from dresses my kids wore would be a great memory piece - even better than a quilt!

Unfortunately, the design team has dissolved due to the illness of the designer and creator of ColoriQue.  Praying for a return to good health for you, Lisa!  Since I was already halfway through my post for the next month, I decided to complete it and post it here.

The theme this month was weddings and I created bridesmaid jewelry.  I chose some acrylic roses and some silver leaves that I found at the craft store to color with the ColoriQue inks.  The silver leaves were part of this headband.
I took them apart.
Since there is a lot of dimension in the leaves, they will be perfect for multiple layers of ink.
I brushed on Verdigris first, then buffed off a little of the color.  Then, I added Snow Summit and brushed the edges with Pink Ice to give them more depth and to coordinate with the roses.

I colored the cream acrylic roses with Pink Ice.  It gave them a beautiful enamel-like look.  Yes, it works on acrylic, too.

Here are the earrings and pendant I created.  Each rose and leaf hangs from a jump ring attached to the earring wire for a swingy earring.  A beaded dangle completes the earring.
The necklace is the same set hung from a chain.  Perfect for a summer garden wedding!

ColoriQue is available through Lisa's site for awhile, then through the Clearsnap site.  It's great to work with - it blends easily to create a whole range of colors, has intense pigment and a little goes a long way!  I certainly will continue to use it in my design and artwork and will miss working with Lisa and all the design team.

Saturday, May 5, 2018

Etched Herb Jar

Hi Everyone!

Today I have another tutorial on using etchall®  This tutorial will be seen again in June on the etchall® blog.  Did you know that etchall® now has a blog?  We do!  Go here to see all the designs from our team.  And, stop by the Pinterest page to see much, much more!

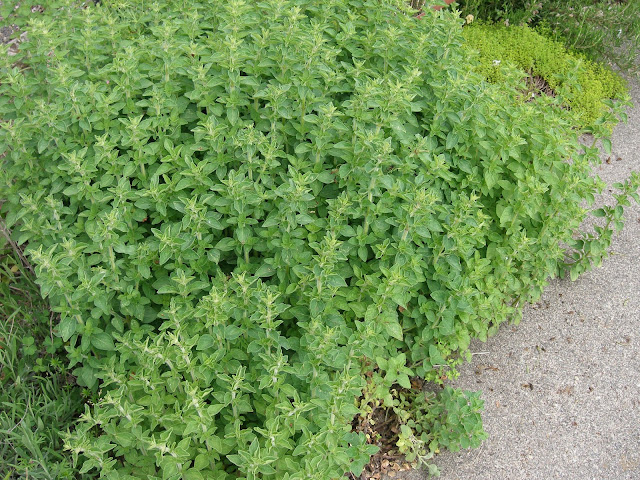
My herbs this spring are thriving.  In fact, I may need a machete soon on the some of them!  Here's my oregano.

I use oregano all the time in my cooking so it is handy to have it in the kitchen.  I use some fresh herbs, but I am more used to reaching for the dried herb jars and bottles that are right next to the stove.  So, I decided to dry some of my own.  I'll have a great supply and it will be so much fresher than what I could buy at the store. 

But, I needed some storage.  I think glass jars are the best for herbs, and I found the perfect bottle in my cupboard.  It was one of those I couldn't throw out and is just the right size for an herb that I use all the time.
I have been wanting to try the Designer Tip Kit that I received from etchall® and now seemed the perfect time because none of the stencil letters I had would fit on the jar.
This fine line tip is great for the small area on the jar.  To set up, I masked off the areas around the etching area just to be safe.  I also wrote out the word on a piece of lined paper and taped it inside the jar.
This provided a guide for size and spacing the letters.  Here's the jar with the word in etchall® etching crème.
It was very easy to do with the fine tip of the tip kit.  I let it etch for 15 minutes and washed it off. Etchall® etching crème is re-usable, but there wasn't enough to save here.

Here's the jar after etching:
I wanted to add a little color to the etched word to make it more visible.  I used Antique White Rub 'n Buff to do that.
Etched Herb Jar
Now, I'm on the hunt for more jars to etch to store my herbs.  This was an easy and quick way to label a jar.  This is simple with just the word, but you could certainly add some vines and flowers or whatever decorations you like to the jar with the fine tip applicator.
Etched Herb Jar by Terry Ricioli
What will you label with etchall® etching crème and the Designer Tip Kit?  Here are links to get you started:
For the Designer Tip Kit:


For the etching crème:
As a member of the etchall® design team, I received product for use in my designs.  But, I love the product and would use it anyway!


Wednesday, May 2, 2018

Creating with Joy April Roundup

Hi Everyone!

We've had a busy month on the Creating with Joy blog.  Here's what we created in April.

We decorated everything from a spring frame for your special photos and pots for your herbs:


Some very cute kitty slippers-

A bag and a shirt--


A journal for your gardening ideas--


A beautiful sign for spring--

A plaque to commemorate a wedding--


A cowboy hat--


And, a tropical birthday banner--


How's that for a variety of ideas!  What will you create with Joy letters?  Head on over to the Creating with Joy blog for more inspiration!