Hi Everyone!
I'm excited to announce that I have joined the Gwen Studios Design Team. Now, you'll see new designs with Gwen Studios here on a regular basis. This month we're all designing wedding items, so you'll find wearables, table decorations, albums, jewelry and other items suitable for a wedding on the blog hop.
For my designing, I received lovely coordinated fabrics, ribbons and trims. I have always loved the combination of plum and pink. It has a lovely old-fashioned look.
You can create accessories for your entire bridal party with these fabrics, ribbons and trims. I have a few ideas for you here, and my fellow designers will have many more ideas to share on the blog hop.
First, I'm going to create a fascinator that would be suitable for a bridesmaid or the flower girl. To begin, I'm wrapping a headband with the 3/8" ribbon from the satin ribbon pack.
Cut a small piece of ribbon to cover the ends of the headband to start.
Then, wrap the ribbon around the headband adding glue on the inside of the headband as you go. Adding glue to the inside keeps any glue seepage from showing. Finish by gluing the ends and trimming the ribbon. I used about 6 feet of the ribbon.
To make the flower for the headband, cut teardrop shapes from the 1 1/2" ribbon. These do not have to be perfect. If you have a punch, you can use that, but freehand makes a more natural petal.
After you cut out your petals, use a candle flame to seal the edges. Hold them carefully with tweezers and pass the edge of the petal just outside the flame. The melted edge of the petal can be hot, so take care not to touch the edges before they have cooled. You'll end up with very natural looking petals that curl into a cupped shape. (This should be done by an adult.)
For a base for the flower, cut a circle of stiff felt. Then, starting on the outer edge, glue your petals around the circle. I used hot glue for this. Continue in for another row or more for a fuller flower.
For the center, I used one of the fancy trims in Blush Pink. I rolled up the trim, then flattened it and continued to add more in a twisted roll. Tuck the end under and glue. Since this trim is wired, you can continue to shape it.
Here is the finished flower:
I used the same method to create another flower for a wrist corsage. For the wrist corsage, wrap an aluminum cuff with ribbon. For both the fascinator and the cuff, make a tulle nest for the flower and glue it over the cuff or headband. Glue the flower into the center of the tulle.
And, here's the cuff on my wrist.
These ribbons and trims are perfect to add bits of glam to every part of the bridal party's wardrobe.
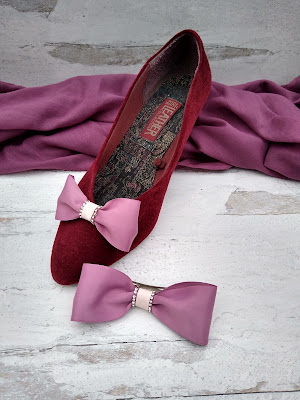
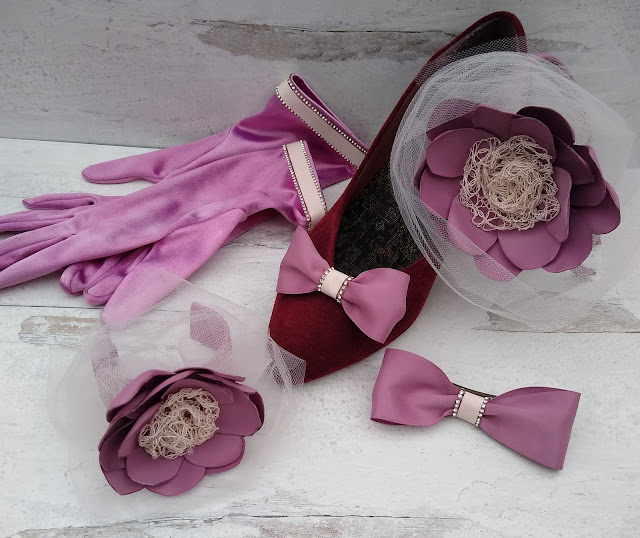
Here's an easy shoe clip. Cut 7" of the 1/12" ribbon. Overlap ends 1/2" and glue into a circle. I used Beacon's Felt Glue. Center overlap at the back. Let dry and wrap with a piece of trim and glue. I used the blush pink ribbon with a rhinestone edging. Glue onto a shoe clip finding or a clip-on earring finding. Create a hair bow with a longer piece of ribbon (9") using the same process.
And, for one more easy addition to the wedding attire, decorate a pair of gloves. It's so easy to do and adds a finishing touch to your wardrobe. These gloves were purchased at JoAnn's and were white satin. I dyed them with some Rit(R) Mauve dye and glued the same trim to the edge of the gloves.
Here's the entire set:
To find these items go to Walmart.com.


what sweet projects, I really like how you created the flowers
ReplyDeleteThanks, Janet
ReplyDeleteLove the flower Terry! Great projects...
ReplyDeleteThanks, Julie!
DeleteThese are great projects. I especially love how you made the flowers.
ReplyDeleteThanks, Sue!
ReplyDeleteThese are just beautiful projects, and you make them look so easy!
ReplyDeleteSo pretty and love that flower!
ReplyDeleteGreat projects! Need to try this.
ReplyDelete