Pages

Friday, December 29, 2017

Coffee Filter Angel

Hello and Happy New Year!

I love angels and every once in awhile, I just have to create one.  (See my Pinterest board for some of the other angels I've created.)

Now is the perfect season to create one - or a bunch - and I've had this idea "brewing" in my mind for awhile!  (I know, it's a bad pun!)

For this craft, you will need a foam cone (9"), a foam ball (2") and fluted coffee filters.  You can use unbleached filters like I did or white ones if you like.
Materials for Angel
You will also need some craft basics - craft or paper glue, toothpicks and scissors.  You can also use sequin pins or straight pins to attach the coffee filters.  And, of course, add embellishments of your choice.

To start, cut into a coffee filter and cut around the center. 
Wrap the ruffle around the base of the cone.

Continue to wrap the ruffled filters around the cone overlapping as you go.  Pin or glue at the back and trim any extra.  You can also use tape.
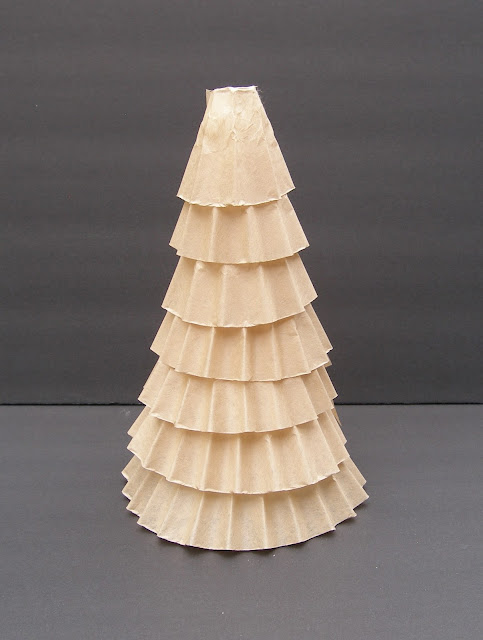
Here is the base of the angel.  Press any extra filter down on the top of the cone.

(Or, you could make a cute tree with this.  The fun thing about coffee filters is that they are so easy to color with things like paint or dyes, even food coloring.)  (See my Coffee Filter Turkey for more ideas on dying with food coloring.)

For the head, place the foam ball in the center and wrap to the back.  The smooth center will be the face.

Adhere the filter to the ball as you wish and trim the excess.  It doesn't have to be neat because hair will cover the back.  Now, push a toothpick into the ball and push the other end into the top of the cone.

For the arm, fold a filter in half and roll it up.  Do the same for the other side.  Glue the edges and attach to the angel on either side.  If you want a less bulky sleeve, cut the coffee filter in half.

There are any number of ways that you could make the wings, but here's a simple way.  You'll need two filters for each wing.  Fold one filter almost in half; fold the other a third of the way.
Slide the bottom one shown into the top one.  This will give you multiple layers on the edges.

Adjust your folds if necessary, then fold in half.

Make your second one and add glue in between the layers before gluing each wing assembly to the center of the back.

To make the hair, I cut thin strips of the fluted portion of the filters and glued them to the head.  You can curl them up or smooth them to make any hairstyle you like.  Then I added a small piece of filter for a collar.

Here is the angel:
Coffee Filter Angel
Happy New Year!


Sunday, December 24, 2017

We're All Ears - Leftovers Challenge

Hi!

I've got a list a mile long of things that I want to get done today.  We don't have a Christmas tree yet, I need to pay the bills and send out cards - and I haven't finished my shopping yet!  (This was last week!)  But, I'd rather be beading!  I should get a shirt that says that!

So, I'm making some earrings - because they always make good gifts, too - so maybe I can cross a couple of items off my list at the same time!

Erin challenged us to take a picture of our work areas.  Take a look at hers here.  And, I think I can match hers.  I don't know if that's a good thing or not, but it does leave me with plenty to work with in making earrings!

Here's my workbench:
At least, there is the possibility of finding some space to work here. 

But, my desk looks pretty hopeless!
Oh my!  What a disaster!  Right after Christmas, I'm tackling this mess.  (Right!)

Earlier this week, I made some earrings for friends.  I like to make easy holiday earrings.  This year I made some snowmen.
Snowman Earrings
They were fun to make once I figured out what to use for the hats (sequins and seed beads).  I might add little scarves though I like them this way, too.

Here are a couple with little scarves of Kreinik ribbon.
Now it is the 24th, and, unfortunately, circumstances did not permit more beading.  Maybe next year!  I'd like the gift of time for Christmas!

Merry Christmas, everyone!  Wishing you peace and joy and happy beading in the New Year!


Wednesday, December 6, 2017

Etched Mirror Ornaments

Happy Holidays!

I love the holidays and love to decorate in new ways each year.  This month, I'm creating a mirrored ornament with etchall® etching crème and a new product - etchall® stencil spray.

Before I received the etchall® stencil spray, I would have to use an adhesive-backed stencil.  Now, I can use any stencil.  I found some small square and round mirrors at my local JoAnn's craft store.  They come in a wide variety of sizes and are lightweight enough to make into a ornament.

To start, I followed the directions on the back of the stencil spray and sprayed the back of the stencil.  I let it dry and applied it to a square mirror.  I smoothed the stencil down and masked any exposed mirror with masking tape. 
Then, I applied etchall® etching crème with a plastic knife. 
I waited 15 minutes and scraped the crème back into the bottle. (It's re-usable!)  Then, I washed the mirror and patted it dry with paper towels.

Here are my ornaments.  I have added some adhesive jewel strips and a loop of thread.  I also glued  cardstock over the loop to cover the back.
Etched Santa Ornament
Etched Snowman Ornament
Here they are again with the etchall® etching crème and stencil spray that I used in this project.  (I am on the etchall® design team and received these products to use in creating these projects.  And, by the way, I highly recommend them!)

I hope you'll give these quick ornaments a try.  Get the whole family involved!  Have a neighborhood crafting party!  You can find all sorts of small mirrors at your local craft store and the etchall® products on the etchall® website.  Be sure to check out the specials and etchall® is now available on Amazon!

Wishing you very happy holidays and a Merry Christmas!


Monday, December 4, 2017

Word Christmas Tree

Hi Crafty Folk!

I hope you are all enjoying the Advent of Christmas.  Here's a craft I created for JOY Iron-on letters that I want to share with you.

Word Christmas Tree
You can find the easy instructions on the Creating with Joy blog.  This word tree is so much easier and quicker than painting the words!  And, you can use any fonts you like.  Or, change the words to use your favorites.

Have fun decorating!  And, come back soon!  I have a few more Christmas crafts up my crafty sleeves!