Hi Crafty Friends!
I love fall and I love to create items to decorate my house for the season. This month I created a little scarecrow shelf sitter. This easy scarecrow can sit among the pumpkins and other fall decorations. He's easy enough for any age to make with adult supervision on the glue gun.
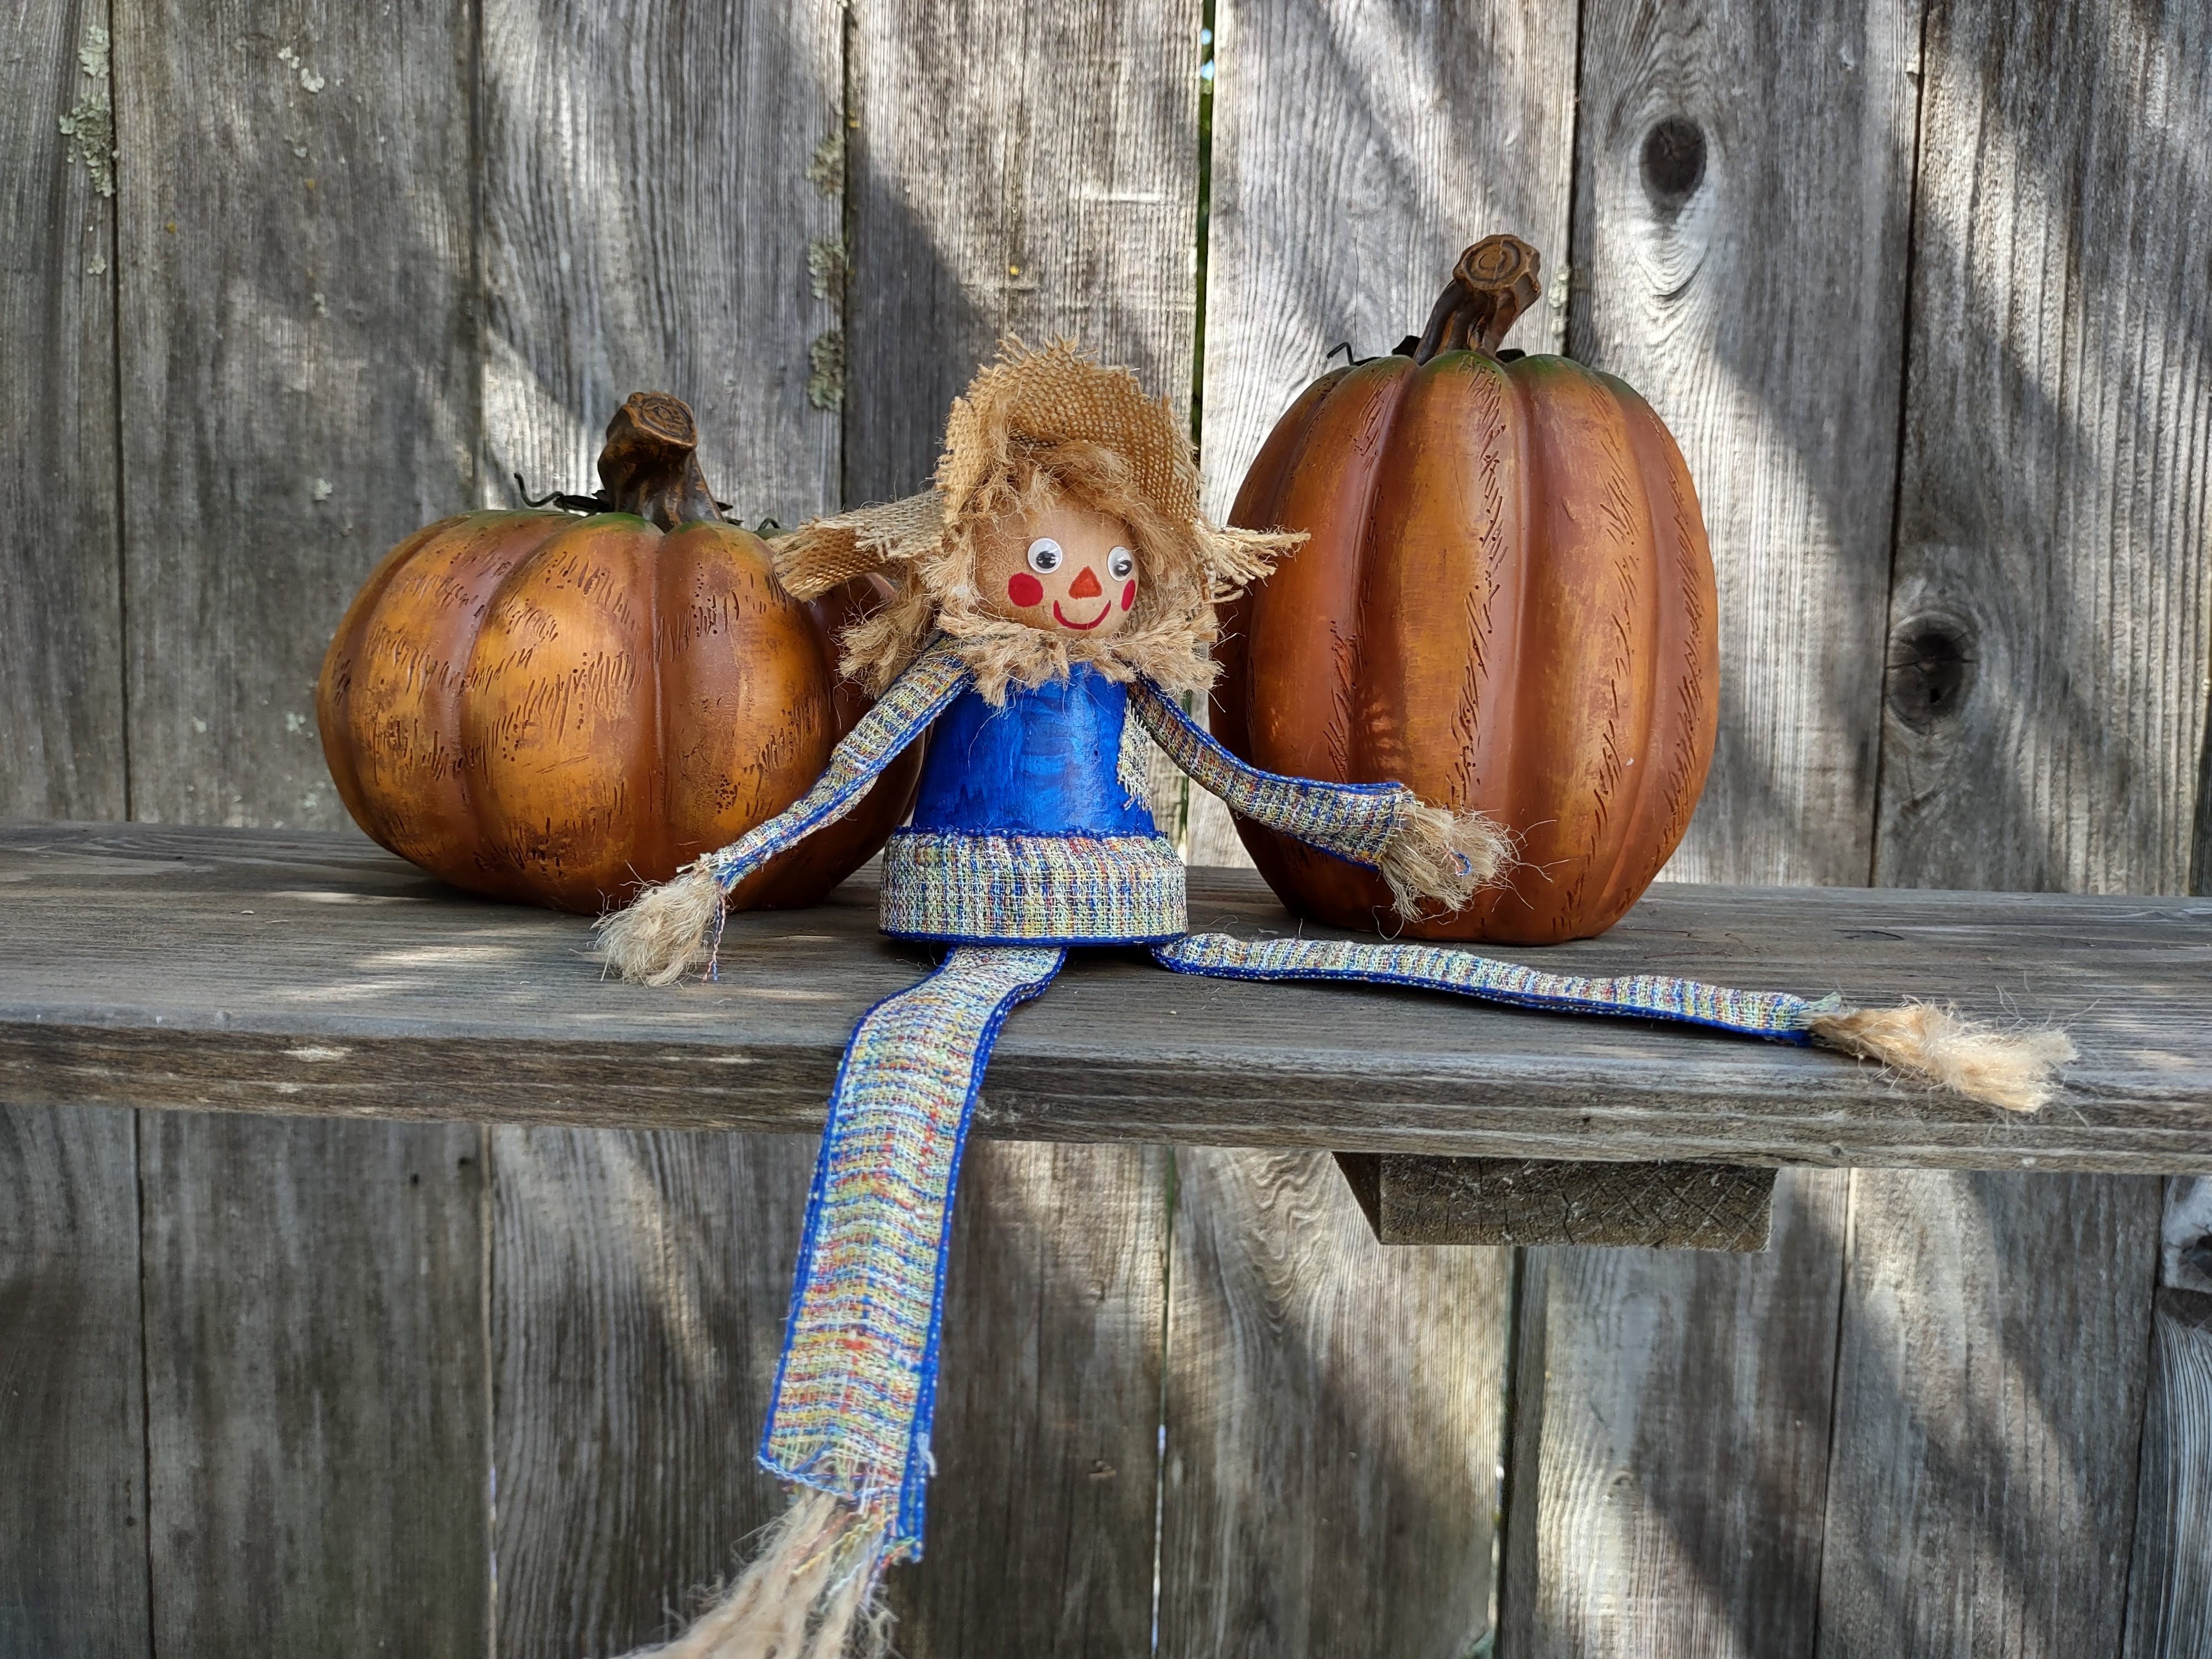 |
| Scarecrow Shelf Sitter |

Here are the materials I used:
3" terra cotta pot
1 3/4" wood ball knob (this has a flat side)
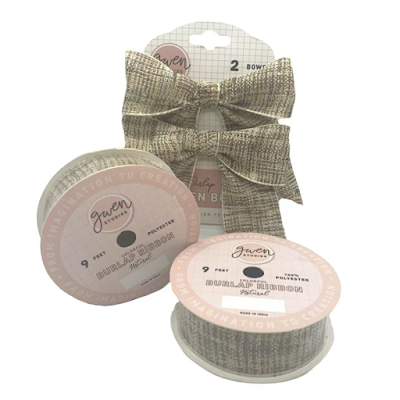
Gwen Studios 1" burlap ribbon
Twine
Sewing needle and tan thread
Hot glue, white glue
Wiggle eyes
Acrylic paint for the pot and features (or permanent pens for face), paintbrush
Craft wire (optional)
Instructions:
Paint the pot and let dry.
Cut lengths of ribbon for legs and arms (4 - 6" pieces and 4 - 3" pieces). Cut twine to be glued between the ribbon lengths (12 - 7" pieces for the legs and 12 - 4" pieces for the arms.)
Lay 6 pieces of twine on a ribbon and glue the other ribbon on top sandwiching the twine between the ribbons. If desired, add a matching length of craft wire for more poseability.

Glue a length of ribbon around the lip of the pot. Pull up the top wire of the ribbon to gather and fit the lip and glue. Glue a patch to the front.
For the head, glue wiggle eyes in the center of the ball. Glue short pieces of twine on for the hair. Trim and fringe hair. Add more features with pens or paint.
For the hat, loosely sew a 1 12" circle with the tan thread in the center of the burlap circle. Pull up the ends of the thread to create a crown for the hat. Tie off and trim. Glue a patch to the brim of the hat.
Hot glue the head to the bottom of the pot. Hot glue the arm edge next to the head. Hot glue the legs inside the pot.
Here's the scarecrow with the arms and legs, hair and hat.

Cut small lengths of twine and fray one end. Glue the unfrayed ends under the head.
The burlap ribbon comes in several colors. Here is a link:

For more fall designs with Gwen Studios ribbon, head over to the Designer Crafts Connection site.

Disclaimer: I am on the Gwen Studios design team and receive their beautiful ribbons for use in my design work.


