Pages

Thursday, August 25, 2022

Easy Fabric-Wrapped Pumpkins

 Happy Harvest!

Harvest is starting here in our neck of the woods.  For us in this county that means apples, grapes and vegetables.  I love this time of year and it's always fun to decorate for fall with its bright, warm colors.  One of my favorite decorations is pumpkins.

This year, I'm making fabric covered pumpkins decorated with Gwen Studios ribbon.  These were such fun to make, and they are so easy, that I made a bunch!

I started out making large ones (4-6") and made three in different fabrics.


Then, I found the cutest tin pickup truck perfect for fall decorating, so I had to make pumpkins to fit it.


Here's how I made them:

You'll need:  foam balls, fabric, hot glue or thick tacky glue, grosgrain ribbon, pieces of sticks, ball-head pins, sequin pins (optional), scissors

1.  Flatten the foam ball on opposite sides.


2.  On one side, scoop out a cone-shaped piece with a kitchen knife.  This will be the top.
3.  Place the ball bottom down in the center of a circle of fabric (wrong side up). Your circle needs to be big enough to wrap the sides to the center.  (The diameter of your fabric circle is the circumference of your ball.)

4. Bring one side of the fabric to the center of the ball.  Then, pick up the edge close to the center and overlap in a pleat.


Use a pin to hold the fabric in place.  Trim away the center fabric if you have too much.  Lift up the fabric and add glue to the center hole.  Press in and around the hole using the end of a paint brush or other implement.

5.  Make a ribbon leaf using grosgrain ribbon like I did or another type of ribbon you like.  Cut a length of ribbon (3-4") and cross the ends.  Stitch or glue to hold.  

Glue the cut end of the ribbon leaf into the center pressing it into the hole.  Glue a short stick in for a stem.
Here are the larger pumpkins before I added the leaves. After doing it this way, I decided that it's easier to glue the leaves on first, but it works either way.

Here are the finished pumpkins.  Add one, two or three leaves in the color you like.

For the smaller pumpkins, I used sequin pins to hold the fabric and pushed them into the center to hold.  Then, I glued in the leaf and stem.

For the grosgrain ribbon, I used Gwen Studios ribbon available at Walmart and Michaels. I am a Design Team member for Gwen Studios and receive ribbon samples with which to design.  

Happy Harvest!

Need more ideas?  Check out these fall decorating ideas:

Saturday, August 6, 2022

Back to School with Gwen Studios

 Hi Everyone!

It's Back to School time!  I can never get used to an August start for school, but I know many of you are already back.

There are so many ways to use ribbon for Back to School.  You could make a bookmark, a tassel for your backpack, a new ribbon for your hair or decorate a pencil holder.  That's just a few ideas.  With Gwen Studios ribbons, you'll be able to find colors of every hue!

I decided to show some school spirit and make a decorative ribbon medallion.  It can be used to decorate a bulletin board or hang on your backpack.  Put a pin back on it and wear it or attach a ribbon and wear it around your neck.  Attach a magnet and it will go on your refrigerator to highlight schoolwork or photos.

First, paint a circle.  I chose a wooden one, but you could use cardboard or heavy cardstock and cut your own by hand or with a die cutter or punch. This one is a bit over 3" in diameter.


Next, cut lengths of two different colors of ribbon. I used 4" lengths of a blue satin and a yellow grosgrain.  Lay them together, fold them and staple the ends.  You could also use double-sided tape. For my medallion, I cut 12 of each.  It will depend on the size of the circle and the width of ribbon you use.  


Starting at the compass points, glue the ribbon petals on the back of the disc.  I used hot glue.


Cut two more lengths of ribbon to hang below the circle and glue to the back.  Color a letter with pen or paint and stick to the center of the circle. Cover the back with felt and adhere a pin, loop or magnet.

 Here's a quick tip.  If you fold the ribbon in half and cut the end at a diagonal, you get even points!

 Make it your own:  add another row of ribbons, add more hanging ribbons, write a message in the center instead of a letter or......

You can now find Gwen Studios at Walmart and Michaels!  As a member of the design team for Gwen Studios, I receive samples of ribbon to create these designs.  Check out the Gwen Studios blog for more ideas with ribbon and trims.

Stop by the Designer Crafts Connection blog for more great ribbon ideas!


Saturday, July 16, 2022

Santa and Reindeer Ornaments

 Merry Christmas in July!

It's a great time to start making decorations or gifts for Christmas!  Here's a little set of ornaments that I designed for Herrschners.  It was fun creating all these different characters!  I hope you enjoy them.


Wednesday, June 29, 2022

Party Headband

Hi Everyone!

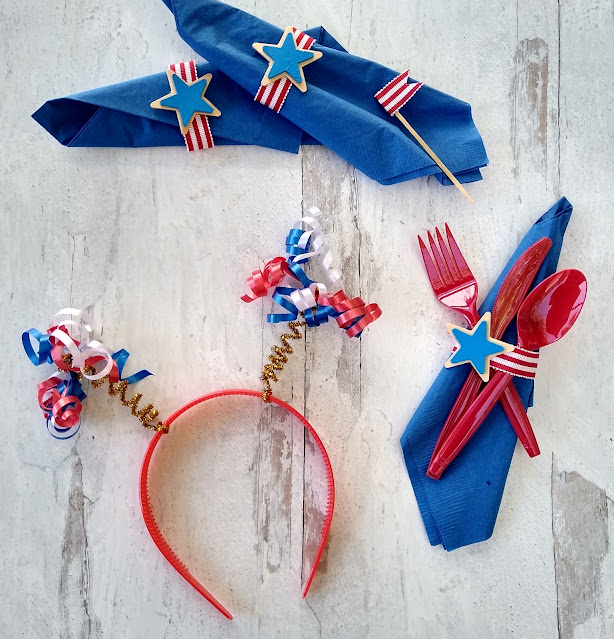
Getting ready for the Fourth of July or a birthday party?  I have the perfect craft for the kids.  It's a fun headband that's super easy to make and fun to wear.

It's made with curling ribbon from Gwen Studios.  It comes in so many colors and it's so fun to curl ribbon.  This ribbon curls right up with the first stroke of the scissors, which is great. (I received these ribbons to use in my designing since I am part of the design team.)

I decided to make a fun headband for my granddaughters to wear for the Fourth of July.  Here's what I used:  red, white and blue curling ribbon, a plastic headband and two glitter stems.  

To start, wrap the glitter stems around a pencil to curl.  Leave about 1 1/2" at the beginning to wrap and glue around the headband.


Cut 12" lengths of ribbon.  I used two of each color.  Line them up and make an overhand knot in the center of all of them.

Curl all the ends.


Wrap and glue the glitter stem around the headband.

Tuck the ribbon knot under the wire end, press the wire together and add a little glue.


These have a lot of movement since they are on a curled wire stem.  The kids will love them.  And, they can help make them, so it's a crafty way to start your party! And, in other colors, what a fun birthday party craft!


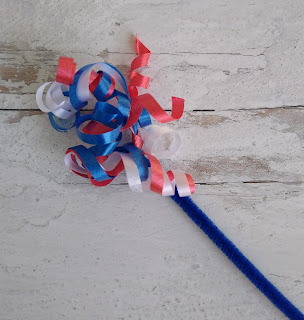
For an even quicker craft, add some curled ribbon to the end of a stem.  They wobble back and forth delightfully! It's great for the younger ones!

Happy Fourth of July!


Bella Crafts Featured Maker

 Oh My Goodness!

I am beyond thrilled to be the Featured Maker in the online magazine Bella Crafts!  And, my project for Gwen Studios is on the front cover!!! So, I have to toot my horn a bit!  


You can get your own copy of this issue at Bella Crafts Summer 2022 Issue - Bella Crafts Publishing

It's full of crafty goodness of all kinds and best of all - It's FREE!  Get yours today!

Tuesday, May 31, 2022

Seasonal Welcome Kits

 Hi Everyone!

Last year I designed this huge order for Herrschners.  For each season, I designed a wall hanging, a tissue cover and a set of coasters in a box.  The coordinated sets each have a border of a quilt motif with colors and style appropriate to the season.

Here's the set for winter:


Look for these kits on herrschners.com under plastic canvas. There's a whole year of stitching for you!


Friday, May 27, 2022

Summer Entertaining with Gwen Studios

 Ahoy, maties!

This month with Gwen Studios we have a nautical theme.  I have some red and white grosgrain ribbon with which to design, and I found this cute wood lighthouse-style birdhouse at Michaels.  It will make the perfect centerpiece for my table.  Michaels also carries the ribbon I used here.


Here's the ribbon I received from Gwen Studios:

To begin, I painted the lighthouse with white acrylic paint.

Next, I sanded it and gave it a wash of gray acrylic paint to soften the white. I painted it with red and blue acrylic accents and glued some ribbon around it.  I also wrapped twine around the posts on top.


Here are a few more ribbon ideas for your table:

Add ribbon to a small bucket and use it for your cutlery.


Wrap ribbon around the top of picks or bamboo skewers and use them for appetizer picks, skewers or decorations.


Use two sizes of stars, paint the smaller one and glue them to a short piece of ribbon for napkin rings.

Now I'm all set for summer entertaining!


Here are the links for the ribbon available at Michaels:

Head on over to the Designer Crafts Connection blog to see more fun ideas!