Pages

Friday, April 15, 2022

Ribbon-embellished Hat for Gwen Studios

 It's spring! It's time for a new hat!

I have just the thing to decorate my new hat - ribbons from Gwen Studios!      


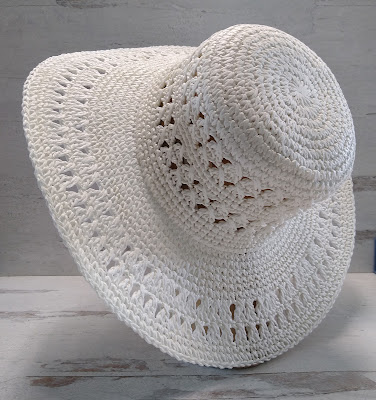
I found this lightweight hat at walmart.com. It comes in five colors.


This versatile hat has so many ways that it can be embellished.  Here's what I did.

First, I wove a 3/8" grosgrain ribbon through the holes in the edge of the hat.  I used a safety pin to weave it, but you could do it with your fingers or a large eye needle.  Then, I hot glued the edges together underneath.


Then, I glued a large peony to one side.


I added a couple of leaves from the peony stem, then glued loops of ribbon behind the peony. To make a loop, simply cut a length of ribbon and fold it in half.  Add hot glue to the ends and tuck it in behind the flower. I used more of the 3/8" grosgrain in light pink and a darker pink grosgrain 7/8" wide.


I liked this, but I thought a few more loops would be better.

So pretty!  Now, I'm ready for brunch or a tea party! 

How will you decorate your spring hat?  There's a myriad of colors and styles of ribbon at Walmart.com.  Just search for Gwen Studios.

Stop by the Designer Crafts Connection blog to see all of our Mother's Day ribbon creations!


Saturday, March 12, 2022

Ribbon Flowers

 Hi Everyone!

Are you ready for Spring?  Me, too! Even if it's still storming outside, these button and ribbon flowers are super easy to make and will be a welcome addition to your spring decor. 

The ribbon I'm using today was provided by Gwen Studios.  I'm on their Design Team and receive materials from them to design a project each month.  They have high quality ribbon in beautiful colors.

This lovely pastel selection of grosgrain ribbon is perfect for spring designs.  To me, they spoke of spring flowers.  I found the perfect collection of buttons to go with them.

You can find these ribbons at WalMart.  I used the 3/8" ribbons found in the Favorites Pack.


In addition to the ribbon you'll also need:

Buttons, assorted to match or contrast with the ribbon

Bamboo skewers

Paintbrush and green paint

A container (I found this one at the dollar store.)

Floral foam to go inside the container

Easter grass or shredded paper

Hot glue and glue gun

Scissors

Ruler


To begin, cut your ribbon in 2- , 2 1/2- or 3-inch lengths depending on the size flower you want.  I used 8 pieces for each flower on most of these.

Hot glue the ends of the ribbon pieces to the back of the button.  I glued four on at right angles, then the next four in between the first set.


Then, bring the ends to create loops, gluing as you go around the button.


Paint your bamboo skewers green.

I chose a pastel green to go with the ribbon.  Stick your skewers in the floral foam in order to paint them.


Trim your floral foam to fit your container with a serrated knife. Press it into your container. Glue the skewers to the back of the flowers.  Cut the skewers different lengths.

Here's a flower with the skewer glued to the back.  You can cover this area with a circle of felt.


Arrange the flowers in the foam and cover the surface of the foam with a layer of tacky glue or decoupage medium.  Sprinkle on shredded paper or Easter grass.  

TIP:  I made my own shredded paper in my office shredder.  Before placing it in the glue, scrunch it in your hand to give it a crinkled look.  

Here's my finished arrangement:


There are lots of variations you can try with this simple flower - make double flowers like the coral one in the photo, use different sizes of buttons, use different widths of ribbon, mix ribbons of different colors in a flower, or add leaves to the stems.  I'm sure you'll think of more ideas.

Have fun creating! And, stop by the Designer Crafts Connection blog to see all the other ribbon designs.



Monday, February 14, 2022

St. Patrick's Day Garland

 Hi Everyone!

Today I'm again working with the fabulous ribbons from Gwen Studios to create a decorative garland for St. Patrick's Day.  

I used the grosgrain ribbon favorites pack to create rainbow colors along the garland, then interspersed them with sparkly shamrocks. 

This is such an easy project that anyone can make it.  It would be a great class or family project.

To create this garland, you'll need:

Green mesh tubing (from the Dollar Store)

A pack of glittery shamrocks (from the Dollar Store)

Gwen Studios Favorites Pack


Gwen Studios gold metallic ribbon

Double-sided tape or glue dots

Scissors

Instructions:

1. Begin by cutting the ribbon in 6" lengths.  Cut at a diagonal, so you don't have to go back and trim the ends like I did!

2. Tie a loop with an overhand knot in one end of the mesh tube and begin tying the ribbons on with a simple knot.  These hold well on the mesh, but you can also add a dot of glue to hold them in place securely.  I tied my ribbons in a rainbow pattern, then left a space of about 2" and continued the pattern.  I had 12 sets of ribbon rainbows and my garland is about 2 yards long.


3. To attach the shamrocks, I cut 3" of gold glitter ribbon and taped the loop to the back of the shamrock. Fold the ribbon over the tubing and tape down.  Glue dots would work well also.  These are lightweight foam shamrocks.  Options:  Hand cut or die cut your own or use felt.

4. Tie another loop in the mesh tubing and trim.  That's it!

Here is the finished garland:


Hang wherever you want some cheery St. Patrick's Day decoration.


Check out the Gwen Studios website for more fun projects! 
Gwen Studios


For more fun St. Patrick's Day projects with Gwen Studios ribbon, go to the Designer Crafts Connection blog.


Saturday, January 22, 2022

New Plastic Canvas Designs

 Hi Everyone!

There are a few new designs of mine available on the Herrschners site.  I hope you'll take a look!


These are farm animal masks that I'm sure the kids will enjoy.

Down at the Farm Animal Masks

And, for those who love cake - some coasters and a tissue box cover.

Cake Slice Tissue Cover and Coasters

And, finally, a little set of organizers for your purse with one of my favorite flowers - pansies.

Pansy Patch Purse Organizer

I hope you enjoy these designs.  There's something for everyone!  Happy Stitching!  Find them all at herrschners.com.

Monday, January 10, 2022

Heart Pillow with Ribbons

 Hello!

Today I'm working with the fabulous ribbons from Gwen Studios to create a ribbon embellished pillow in a shabby chic style.  This is an easy-sew project that anyone can make with a needle and thread and a little hot glue.


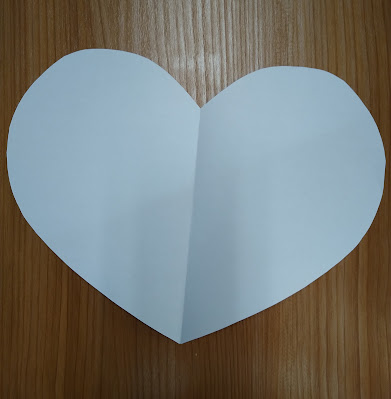
First, make your pattern by folding a piece of copy paper in half.  Draw a heart that fills the space.

Cut out the heart.  
If you're not happy with the shape, refold and trim.  Pin to your fabric and cut two hearts.  
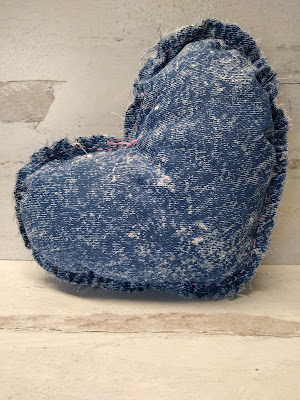
I used some scraps of a distressed denim fabric, but you can use any fabric.  Pin the two hearts wrong sides together and sew a running stitch with pink embroidery thread.
When stitching, leave the thread on the card.  Leave an opening and stuff with Fiber Fill.

Here's how it looks after stuffing.  I pulled up the stitching to gather before tying it off. Then, I pulled threads on the edges.

I added a ribbon bows in satin and sheer ribbons and made a rolled rose from 7/8" pink grosgrain ribbon.  To make a rolled rose, roll up the ribbon for the center, then start twisting the ribbon as you continue to wrap.  Then, I hot glued the ribbons to the center of the pillow.

Gwen Studios can be found at Walmart.com.  Search for Gwen Studios or use these links for the ribbon that I used here:


For more Romancing the Ribbon design ideas, go to the Designer Crafts Connection blog.


Friday, December 3, 2021

Girls Ribbon Jewelry with Gwen Studios

 Hi Everyone!

I had to create a couple more things with the beautiful ribbon and patches that I received from Gwen Studios.  I also tried out their Snap Setting Tool, which was super easy to learn to use.


Here's what you get in the Snap Setting Tool box:

This photo is from the Walmart site, where it is priced at $20.97.  It comes with snaps of different colors and shapes as well as different dies to fit the snaps.

I created a Unicorn Necklace and a Ribbon Bracelet:


They were so quick and easy to make.  Now, that I made one, I know I'll need more for the other little girls in my family. Or, we can have a craft party, because these are easy enough for the kids to do.

To make the unicorn necklace, I backed the unicorn patch with stiff felt using glue.  Since the felt is synthetic, I didn't want to use an iron.  Then, I glued two lengths of grosgrain ribbon to the back.  I applied the snaps to the ends of the ribbon, which I turned under to finish it.  The Snap Setting Tool is very easy to use and can be used with both plastic and metal snaps.

For the bracelet, I used a wider pink grosgrain ribbon under the polka dot ribbon.  I used heart-shaped plastic snaps for the fasteners.  I started with 9" of each ribbon and turned each end under 1".  It fits a 6 1/2" wrist. 


Here are all the links for the ribbons and patches from Gwen Studios


Sequin Rainbow Patch

Fox Patch

Star Patch

Unicorn Patch

Mermaid Patch

Solid and Polka Dot Ribbon Assortment

For more projects with these great patches and ribbon, go to the Designers Craft Connection blog.  


Monday, November 29, 2021

Rainbow Suncatcher for Gwen Studios

 Hi everyone!

Gwen Studios not only has some of the cutest ribbons available as you've seen from my past posts, it has spectacular patches.

Here's what I received for this month's designing:


With these, I created a sparkling rainbow suncatcher:


The colors are so bright and cheerful.  I love the polka dots!


To make my suncatcher, I cut 7" pieces of ribbons in rainbow colors and arranged them on the back of one of the rainbows overlapping the edges slightly.


This is the back of the polka dot ribbon.  I glued the ribbon on to hold it in place.  You can also carefully iron-on the ends of the ribbon.  Then, I added a second rainbow patch over the top.  Since they are symmetrical, the edges match.

Before adhering the patches to each other, I inserted a loop of thin white ribbon.  Follow the instructions on the package to iron the patches together.  Then, I trimmed the ends of the ribbons diagonally.

Here's the finished Rainbow Suncatcher.


What a great addition this would make to a child's room or any sunny window!

Here's where you can find these products from Gwen Studios at WalMart:

Sequin Rainbow Patch

Fox Patch

Star Patch

Unicorn Patch

Mermaid Patch

Solid and Polka Dot Ribbon Assortment